Like most sky astrophotographers, we are constantly plagued with clear nights of average to poor seeing, with the smallest stars ranging from 2 to 4 arcseconds in diameter. For many years, the cure all for sharpening atmospheric blurring was the Unsharp Mask, available in nearly all graphics software packages. The Unsharp Mask simply blurred the image and subtracted it from itself in an attempt to extract the higher frequency information in an image. This single step process boosted artifacts, and often left dark rings around the brighter stars and craters in an image. Recently a number of software packages offer a completely different and much superior method of removing atmospheric blurring, iterative deconvolution. These work by estimating the blur of a star or point source in an image, and knowing it started out as an infinitely small point source, calculates the difference and in tiny steps subtracts it out one iteration at a time. The results are dramatic, and do not have nearly as many artifacts as unsharp masking. One software Package, AIP4WIN is unique in that it employs Van Cittert deconvolution, a robust algorithm that is specially made for lunar and planetary images. Typically, it can double or even triple the resolution of an image taken during average to bad seeing.
Illustrated here are the steps I've developed to obtaining successful lunar images, using the VC deconvolution. All were taken on the night of July 28th, and are with my 12.5 inch Newtonian and an ST7E CCD camera.
Click on thumbnails below for the full resolution image!
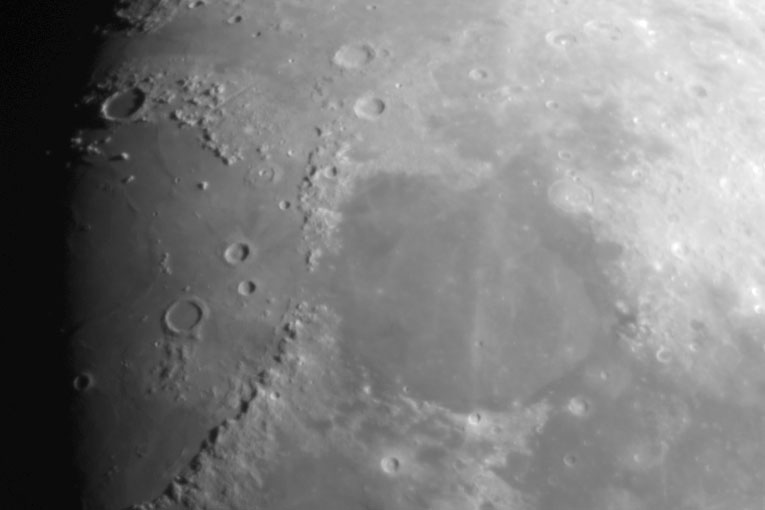
Image 1 - The Original image. This is the full sized image that has had full calibration, and the brightness has been adjusted slightly for full dynamic range.
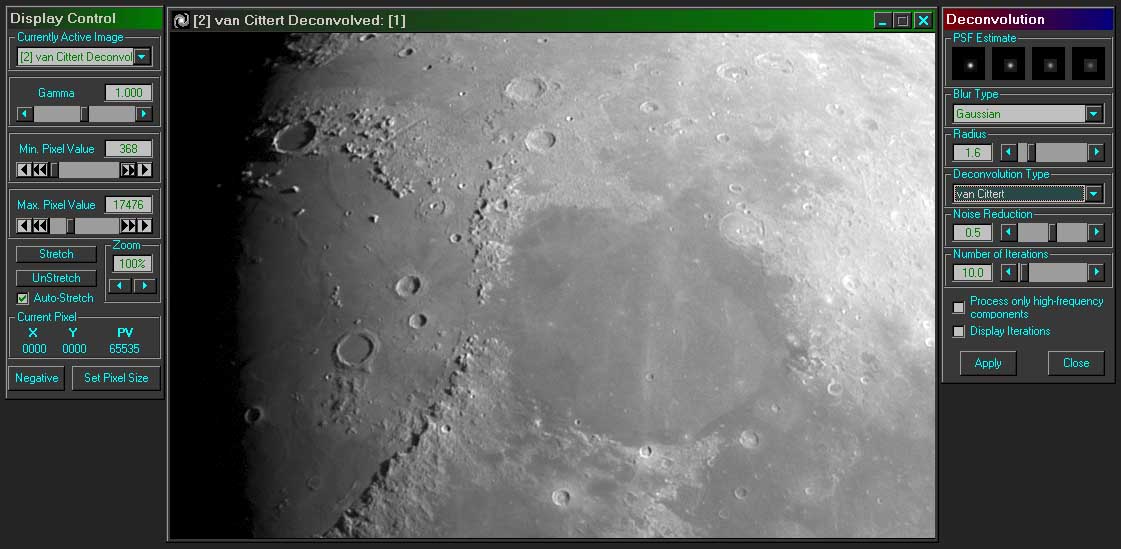
Image 2 - VC deconvolved. This image has had 10 iterations of VC deconvolution. The parameters set up box on the right shows the setting used to deconvolve the image. An explanation for each setting is as follows:
PSF Estimate: This is the size of a star image in pixels with the atmospheric blur in pixels. It is set by measuring a star image taken with the same setup, or by guessing at an initial starting size between 1 to 2 pixels. The blurred disks at the top are the size a star would be in your image with the magnification on the image set to 1x on the computer screen.
Blur Type: Gaussian. This is the type of blur you are deconvolving. use Gaussian for this type of image. it describes the shape of the brightness profile of the blurred star image.
Deconvolution Type: Van Cittert, this is the type of deconvolution you will be using, use this instead of Lucy Richardson, which is reserved for deep sky objects.
Noise reduction: set for .5 to 1, depending on how much noise there is in the original image. the default of .5 is standard for most work. as you go up in value, the number of iterations must increase to get the same amount of sharpening. Anything beyond 1 is a waste.
Number of iterations: Critical to the success of an image. Start with 10 for most lunar shots. if the image looks too grainy in the smooth seas areas, decrease. If the seeing was particularly bad, you may have to increase at the expense of increased noise and mottling. never exceed 30, as artifacts and great amounts of noise will be apparent.
Note the image above after deconvolution is much sharper, BUT looks like a chunk of carved plaster of Paris. The brightness relationships between terminator and disk are now gone. To make the image photographic in quality - always your goal - you must follow the deconvolution with the next step, gamma correction.
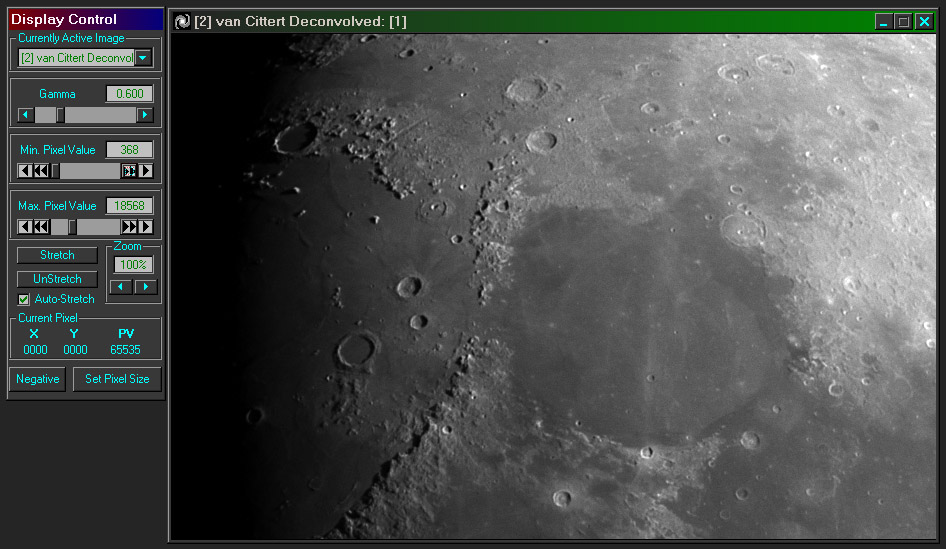
Image 3 - Gamma correction of Convolved image. Reduce the gamma of the resulting image by moving the gamma slider to about .4 to .6, now the gradient from terminator to limb is restored, the seas are fully contrast and rich with ray detail. It now looks photographic and visual in quality. This last step will separate your image from everybody elses, who leaves off this crucial step and has the bland images to prove it!
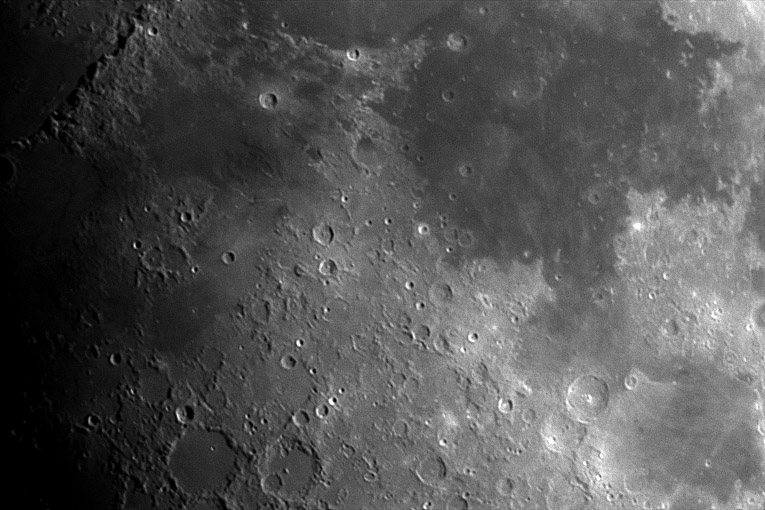
Image 4 - Finished Sea of Tranquility region. Another finished image taken the same night. Note the subtle white ray details in the seas, and rich terminator details.
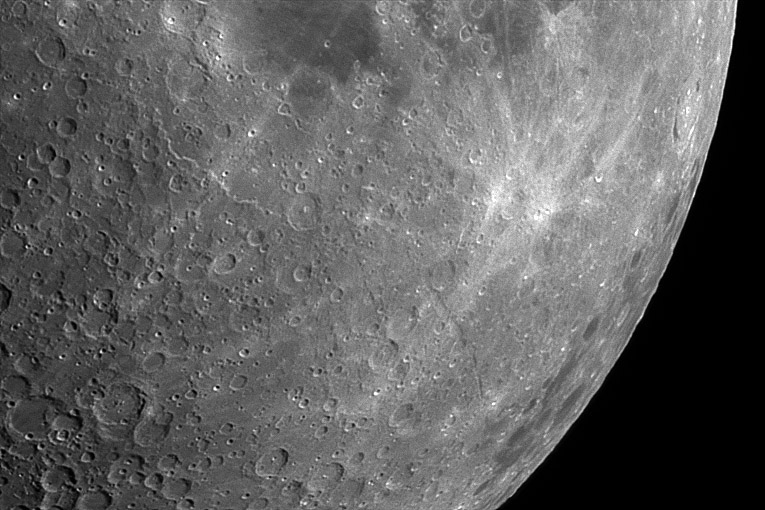
Image 5 - Finished Lunar Highlands. I really like how this one came out, the bright rayed crater on the left is not burned out, and the dark small seas on the limb to the lower right are very nicely detailed. Notice the walled rim just above center creating a huge cliff illuminated in the rising sunlight. This image was badly blurred by bad seeing, but fully restored to crispness by this technique.
Previous Uploads:
Three faces of Comet Linear
Comet Linear A2 6-27-01
Van Cittert Deconvolution of the Lunar Highlands
More Northern Lights and the ISS over Payson
The NGC891 Galaxy Group Notes
CCD Shots during Full Moon
Comet Linear July 19 & 25th, 2000
Latest image of Comet Linear S4
Spectacular Red Aurora over Payson Arizona
Fuji's New Formulation of it new Super HQ100
FIRST TESTS OF HYPERED FUJI HQ100
First Schmidt shots with PJ400
First Tricolor shots with 2415
Test Images with Fuji NPH400
First Two Comets with the new CCD Camera