|
|
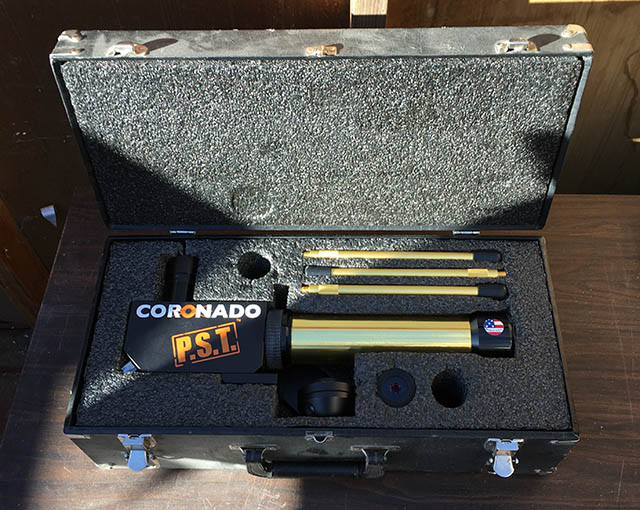
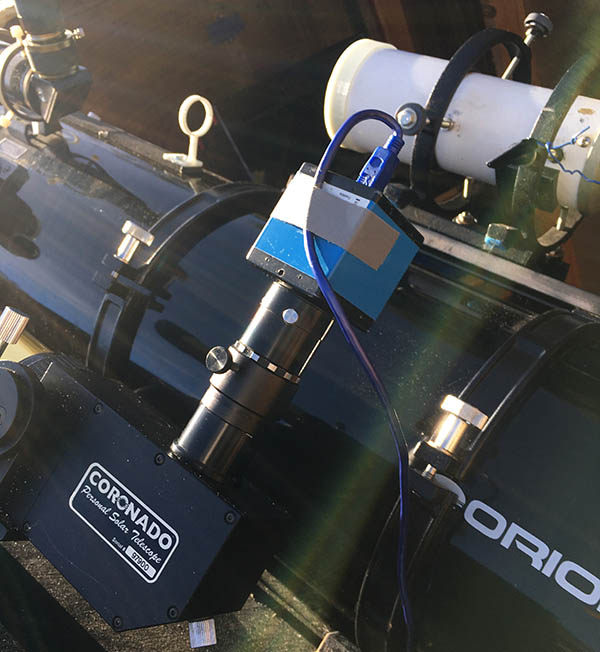
Introduction Coronado Instruments revolutionary PST solar telescope has been highly instrumental in increasing interest in both hydrogen alpha viewing and imaging. But I've seen too many images taken with this instrument that are sub-par, and with a very few tweaks we can achieve a quality suitable for framing on the wall, or sending to magazines and book publishers. In this article, we will go over how to set up the PST for imaging, take the actual images and process them to perfection. You may choose to include all or some of these steps in your current work flow, but I do want to show you it IS POSSIBLE to achieve superb results with this inexpensive instrument. Now lets get started! Basic Equipment setup Here is my basic package which we purchased over 20 years ago at a telescope conference. The foam fitted case comes with the scope, an alt-azimuth mount, three screw in tripod legs, and a solar viewing ocular.
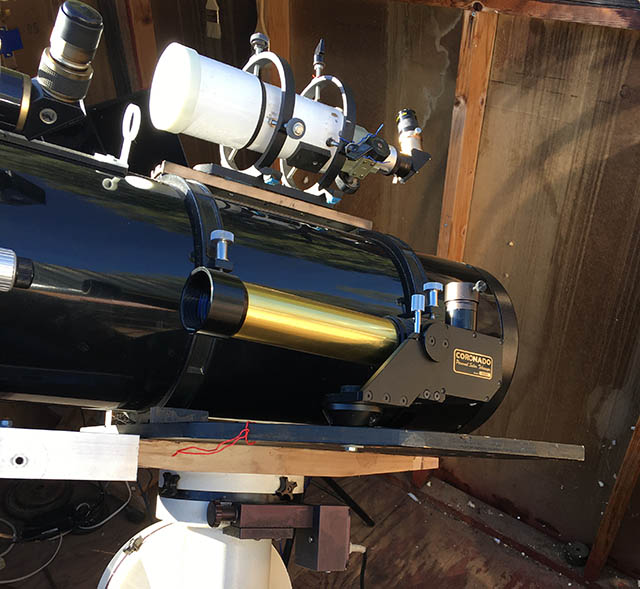
Next, we have to track the Sun equatorially. In my case, I bolt the basic mount and scope onto the side of my 10 inch astrograph, and use its mount to keep the Sun centered while shooting.
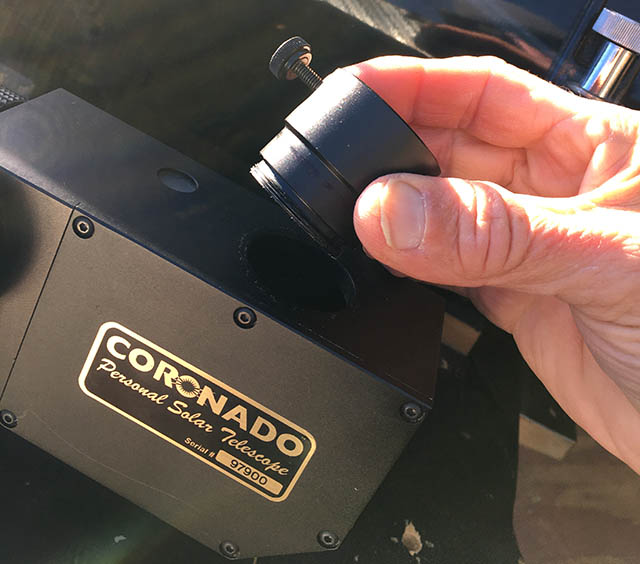
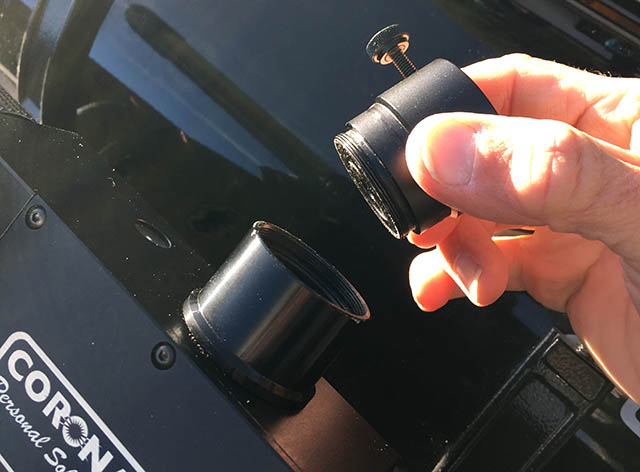
To Modify or to not Modify, that is the question. There are two ways to shoot with a PST. First, if you want to get the whole Sun in one shot and not spend hours piecing together close ups for the final full disk image, you have to do a simple modification to your PST. I do not recommend this for brand new scopes, as it may void your warranty. But after a short time when the warranty expires, any mechanically minded person with a work bench, some basic tools such as two strap wrenches and a heat gun can do the modification. There are a lot of web sites that detail this procedure, so I wont go into it. But for me, it took me less than a half an hour to unscrew the two focus adapters, clean them up and reinsert. To reach prime focus with your camera you will have to have this mod done. But if you dont want to do this, that is fine - you can still get pro grade images using a shortie barlow of sections of the full disk. Lets assume for now that you have freed up the focuser tubes and are ready to start prime focus imaging. First, we install just the upper filter section of the 1.25" focus tube. This simply threads in to the body:
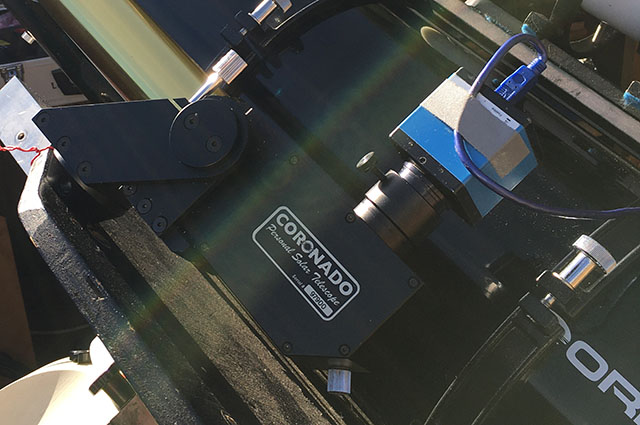
The camera is installed next, you may have to pull it out a bit and tighten the set screw to get the focus in range:
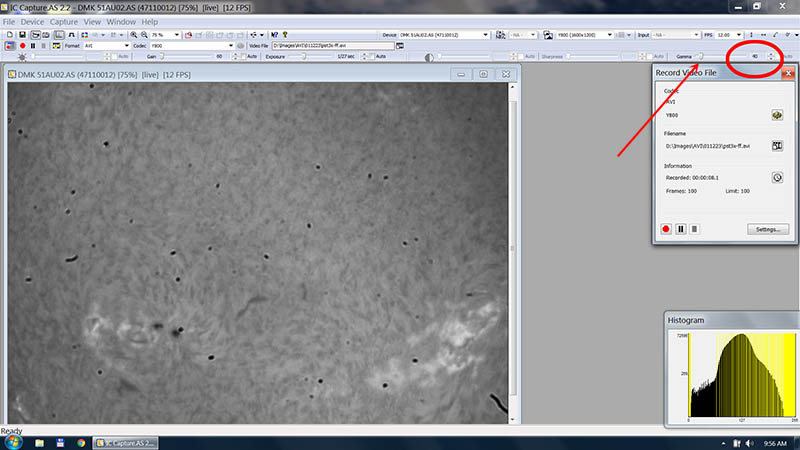
Next we open our imaging application to set focus, brightness, and exposure conditions. I cant stress strongly enough - The settings you capture your solar images in the RAW state are extremely critical to get the final image quality we need. Two points are critical. First, the cameras gamma has to be set to less than 1. I usually set it for 0.4 - 0.6 for my halpha images. Find in your cameras settings how to change this. The default is nearly always set for 1 and is too low in contrast for the sun. IF your camera software does NOT have a gamma setting, then it is time for you to change your imaging software. Fire Capture adds many additional features including gamma adjust. And it FREE. Some cameras cannot adjust taking gamma. Sorry to hear, you will have to make do and try to compensate later. The reason for shooting with an lower gamma is that the stacking software can much more easily lock onto the image details and my experience shows you will get images with twice the resolution by setting to a lower gamma. Second, make certain you are not white clipping in the live histogram. Leave a substantial gap at the top, so that the data is only 2/3 - 3/4 the full 8 bit range. This is critical for later when we process and the contrast is increased by deconvolution or curves adjustments. Setting live taking gamma to 40, which with my software is 0.4 true. Note that the right side of the histogram is all zeros. No white clipping allowed!
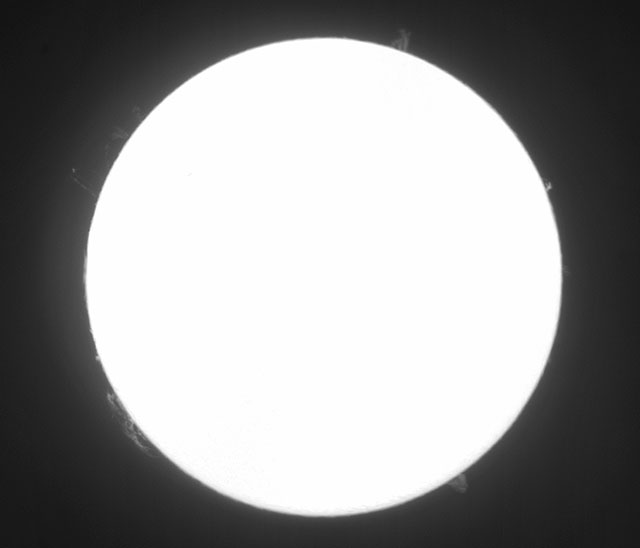
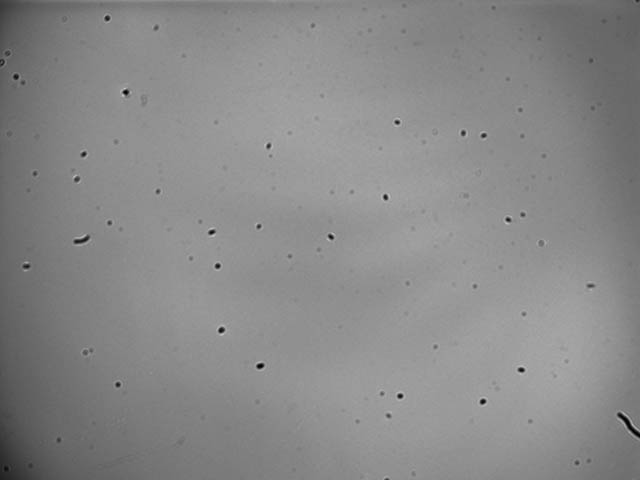
The Raw images will have dust and vignetting. Flats are not easy with prime focus, but usually dust is not seen at this point. Here is the raw prime focus image right out of the camera.
Notice the hot spot in the center, even if we try to tune the wavelength ring, the best we can do is center it.
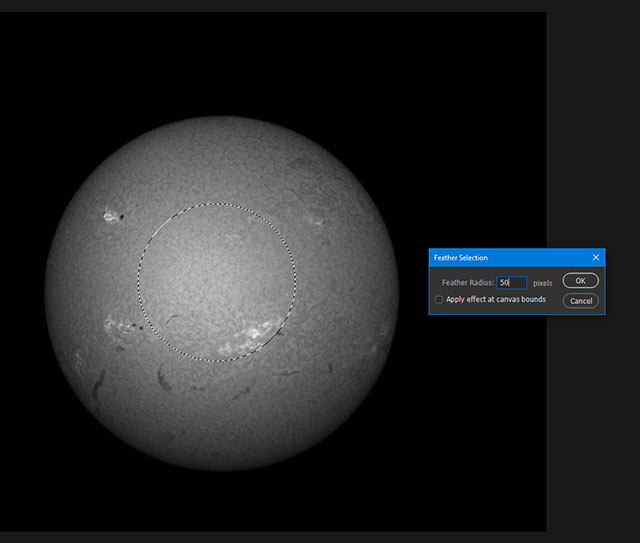
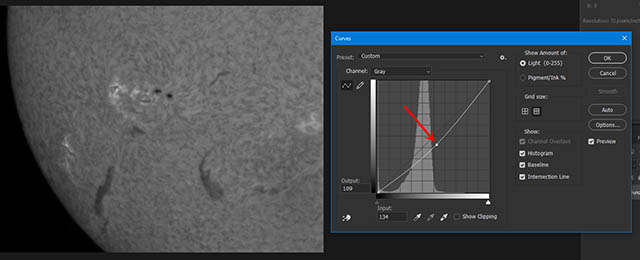
Processing Software. My goal here is to let you know that we use all FREE software to effectively process the solar images to a Professional level. Stacking the images, many use Registax. I dont get the sharpest results with Halpha images with this software. I use Autostakert, which is also free and does a much better job. Like twice better in sharpness. Try it and compare! You will however need Registax or equivalent for the wavelet deconvolution. For brightness, cropping, curves and basic adjustments, you can use Gimp, Picture Window Pro. And for doing the Localized contrast enhancement - ImageJ, Again free. Now lets see what we can do with our prime focus image and all this free software. Stacking. Here you must change your mind set, which has been in vogue with solar, lunar and planetary imagers for years. You want to stack the bare minimum of images so the best sharpest frames are part of the stack. Cameras were so noisy in the past that you had to stack hundreds of images to get the noise down. This is not true anymore. The more images you stack, the blurrier your image gets. I usually stack from 10 - 25 images out of 1200 to 2400 frames. No more than that. If the seeing is bad, its bad. Stacking more to over sharpen it wont make it better. Step 1, getting rid of the bright center. All tilt-tuned filters will have a hot spot in the center. We must remove this to get best results. Start by selecting the hot spot and feathering the selection a generous amount as shown:
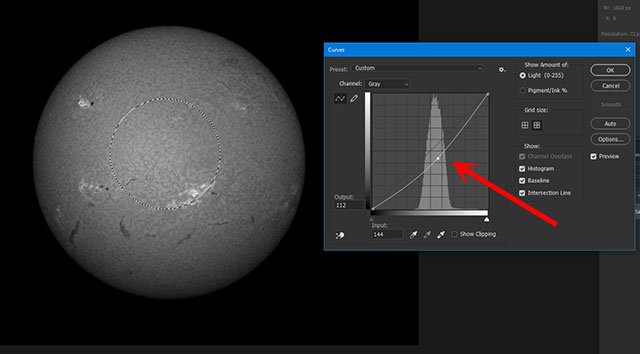
Next, darken the hot spot by pulling down the middle of the curve in the curves adjustment.
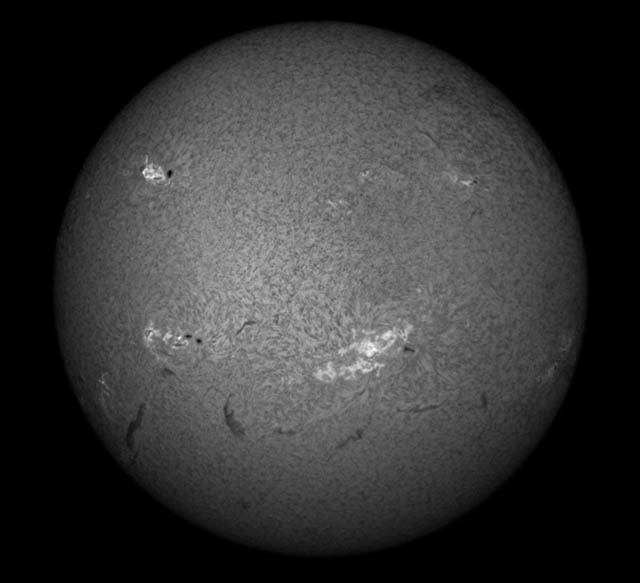
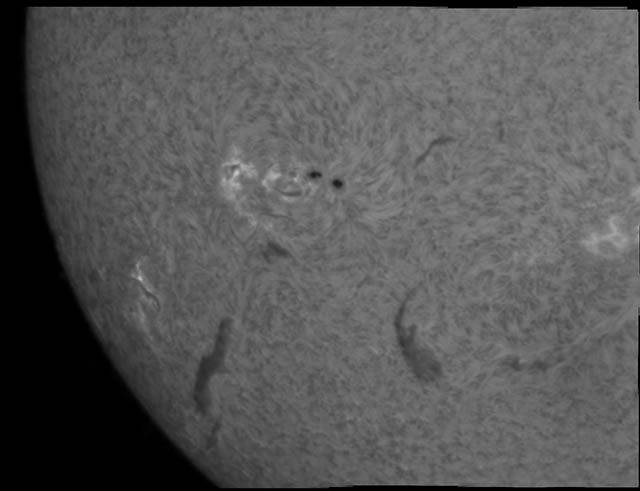
Here is the result with the hot spot removed:
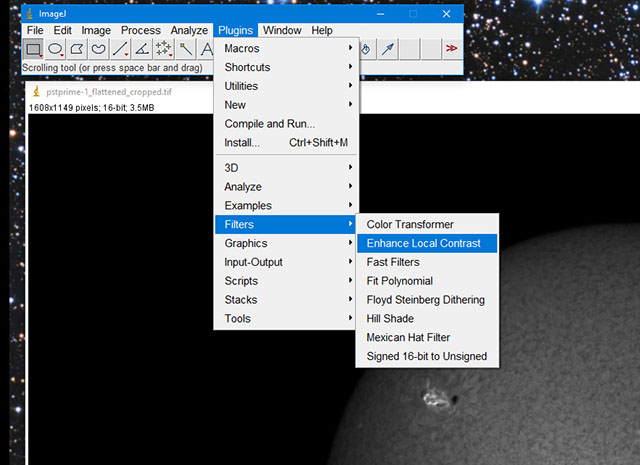
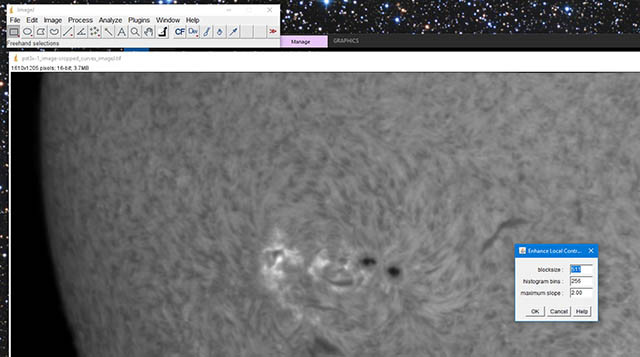
Next we open ImageJ and under the Plug ins menu, open Enhanced Local Contrast. We cant just use normal adjustments to bring up the details, it must be done on a local level. The free ware Image J has this function, and it used by professionals for microscope imagery.
Set the block size to 512, and slope for 1.5 as shown. Hit Ok, and wait for it to finish. You can change the slope if you like for more or less effect.
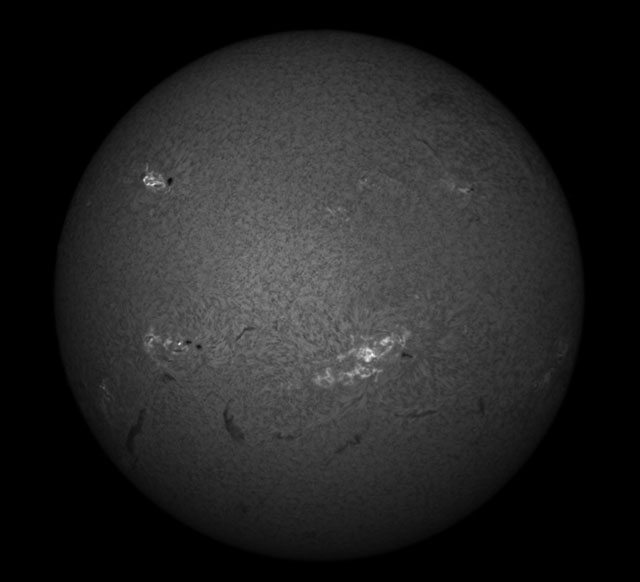
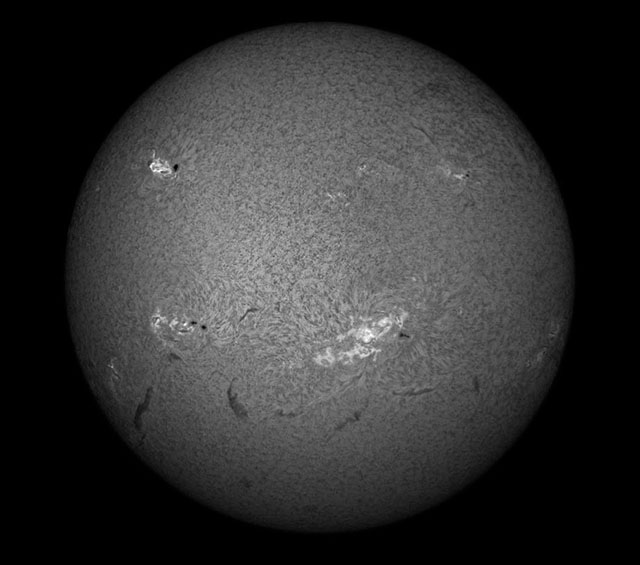
The final enhanced image. This is NOT sharpening, it is a re mapping of contrasts on a local level.
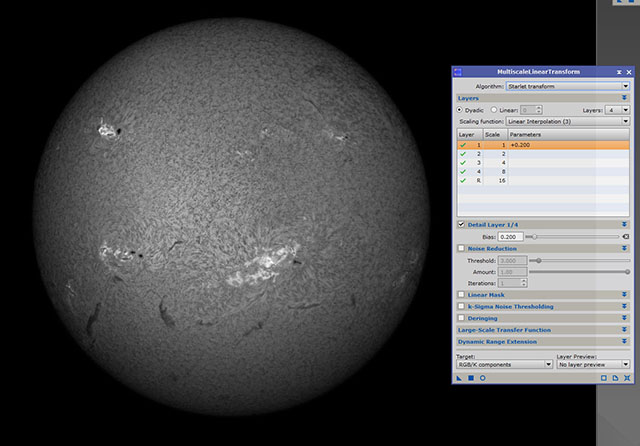
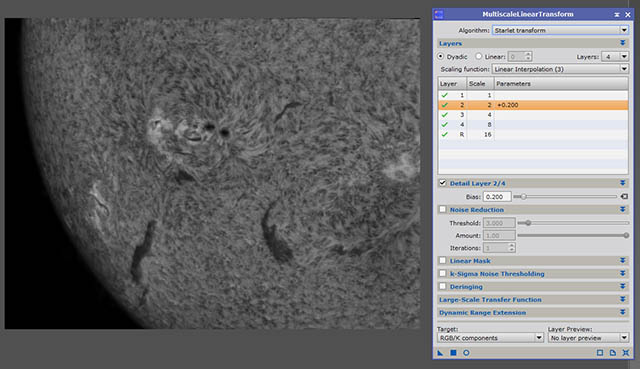
Bring the image into your wavelets sharpening software. Registax is fine, here is what I use - Pix Insight. Only increase the 1 pixel level of detail. DONT OVERDUE IT! Gross over sharpening at this point is the novices most common mistake. Seeing is what it is - dont try to see more detail if the image was taken in poor seeing. To tell how much to adjust, increase until noise appears. Then back off a bit until it is gone. Thats it. You cant make up for bad seeing with more sharpening.
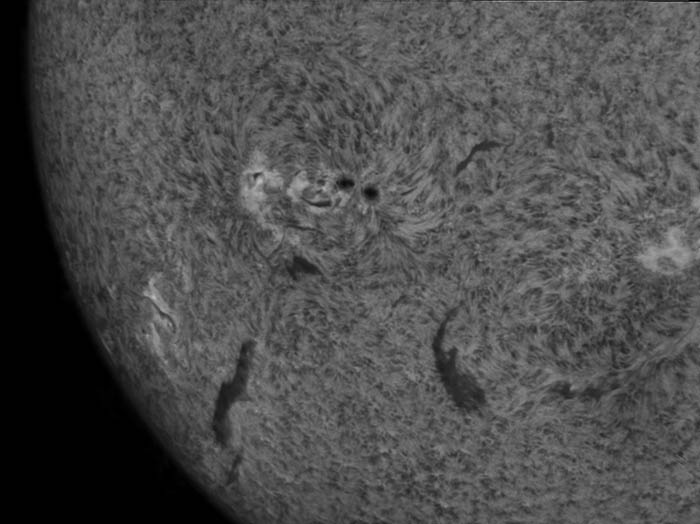
The final image after wavelets. You can also use Richard Lucy Deconvolution. But it is not so easy to find free ware that does this well.
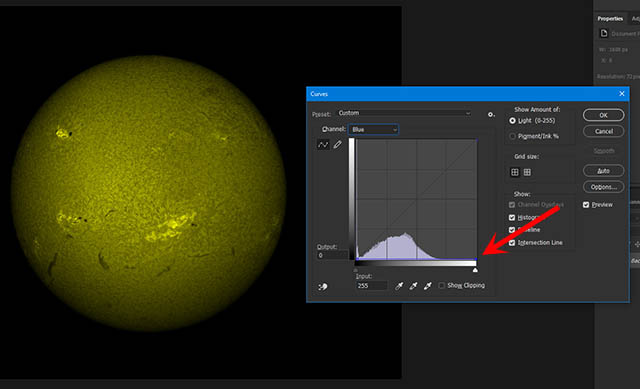
Some imagers at this point stop. Black and white is a fine way to display your work. But consider also colorizing your images - Not for you, but so others get more excited about your shots. And that INCLUDES magazines and publishers. First step is in your image editing software. Open curves and pull down the blue line to zero as shown.
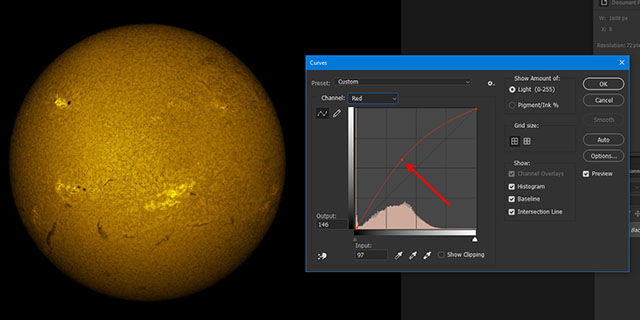
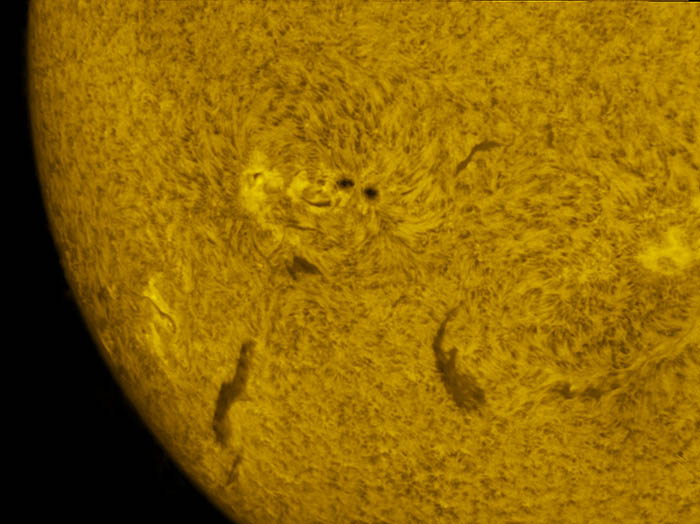
Next, add a curve on the Red line upwards. This is called "Increasing the Gamma". Leave the green line alone.
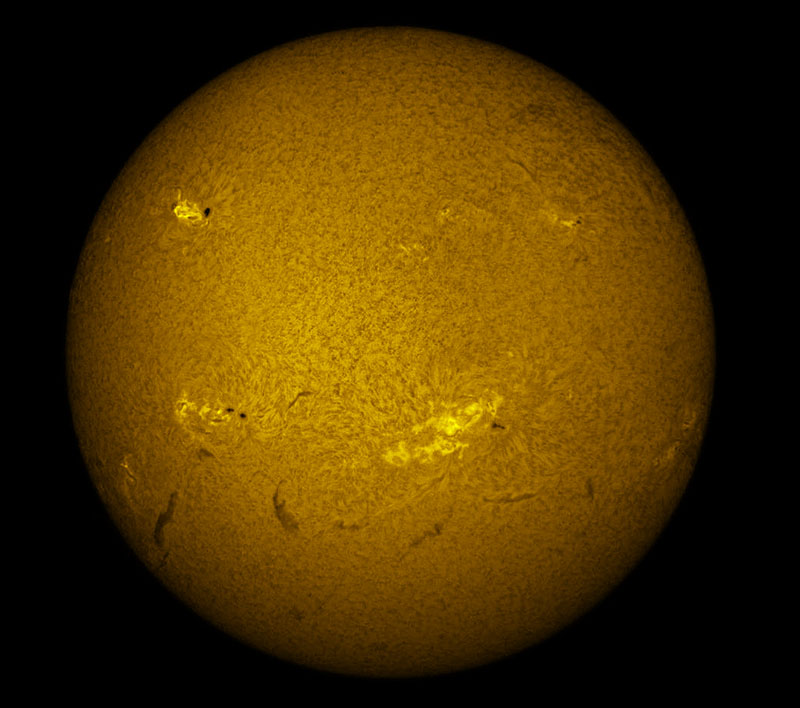
The final colorized image, ready to upload for family, friends, and magazines!
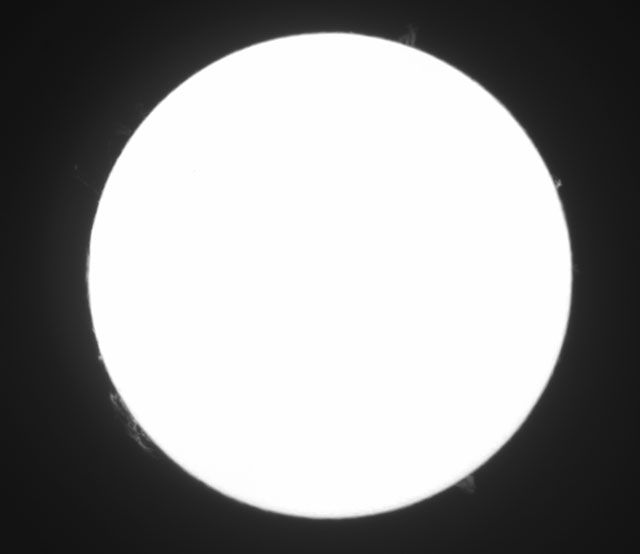
Taking shots of the Prominences at Prime focus For our next image, we set the cameras taking gamma to over 1, about 1.5 is about right. That is because the proms are very bright near their base and dim further out. To get all of it, we turn up the gamma. Here is an an example of the full disk shot which we not only increased the gamma, but then went longer on the exposure to burn out the disk so the proms show clearly:
Again, we apply the same processes - cropping, and then wavelets at a level of 1 pixel to bring up the proms clearly:
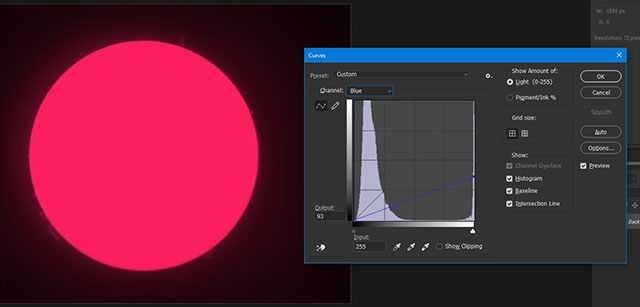
The next step is to colorize the disk and proms. To do this we use a similar method with curves. Leaving red alone, we cut the blue to about half on the right side as shown, then green to half of that. You can use any coloration you like, but here Im using pink which is most natural. Pink is a mix of red = 1, blue = .5, and green = .25 just in case you really wanted to know.
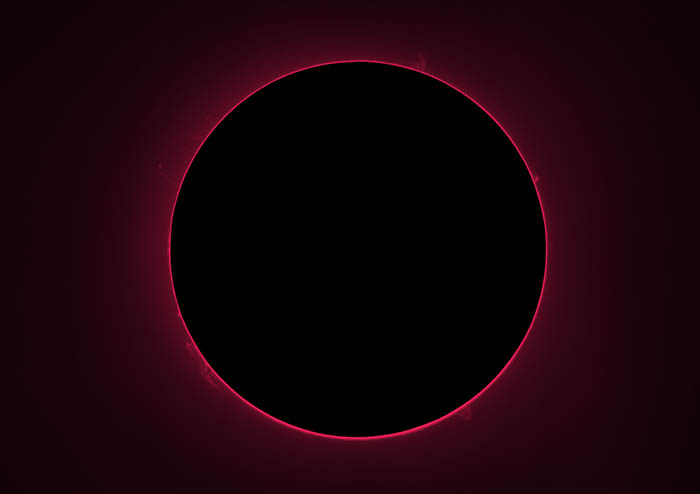
Next we use the circular selection tool or in this case photoshops magic wand tool and select the over exposed disk. Fill with black. It has been found that a bright disk distracts from the faint proms so much as to render them invisible. This makes the sun look like a total solar eclipse.
This final image shows the proms very clearly, and a natural color. Some like to put the disk of the sun in the middle instead of the black and that is fine too, but will hide some of the faint features!
Close ups with the Barlow Next we will show you how to image and process using the shortie barlow. This method does not require the scope to be modified, but will still come to focus with the barlow. You will get of course a partial disk, and to make a full disk shot will require you to assemble them carefully and match. Microsoft offers a freeware program to do this as well but it is a lot more work! For barlow shots, you will need to set up the PST like this. We install the spacer into the body of the scope, then put in the filter eyepiece holder.
A "shortie" 2x or 3x barlow is inserted next, then the camera. A regular barlow wont work, it sticks into the tube too far.
Again, settings are crucial to success! Gamma 0.4 here, and expose to fill only 3/4 histogram as shown. Take at least 1000 frames for best selection.
We also HAVE to take a flat when using the barlow. You do this by panning the field to a blank part of the Sun, preferably near the center of the disk, knock it out of focus to blur details and expose say 100 frames. Later in our stacking programs we select these frames to use as a flat to remove all dust bunnies.
With the images stacked (25 here) and flat selected the image is smooth and very noise free. We will start by cropping, flipping mirror image if needed to this image.
Again, to avoid clipping the flares seen here we also want to pull down the gamma a bit to keep it away from the white clipping when doing our next steps.
Open ImageJ and perform a Localized Image Enhancement as before, but use 512 as the block size and 2.0 or so as the contrast level as shown. You can adjust the contrast to suit.
Wavelets work fine for Halpha solar, but I usually use Richard Lucy deconvolution. Here we are adjusting ONLY the 2 pixel levels in wavelets in pix insight. do not adjust level or or higher than level 2, as it will introduce noise in one case, and gloppy details in the second.
The final image is very detailed and no nose is seen! You can stop here if you like, but remember, magazines like COLOR.
Colorize in a similar way to the full disk shot. Pull down blues to zero, and push gamma of red up. Color to suit.
The final 3x barlow image shows plenty of noise free details.
Conclusions From what you can see here, it is quite possible to use Free ware and get Professional results with a lowly PST. On a day of really good seeing, your results will have the publishers begging for more! Just keep in mind the key points: First, Never ever white clip at any point in your processing. Second, never push sharpening to the point noise becomes visible. Zero noise. Third, always shoot with a gamma less than 1, so the stacking program can lock more effectively onto the signals and stack the sharpest image. |