|
|
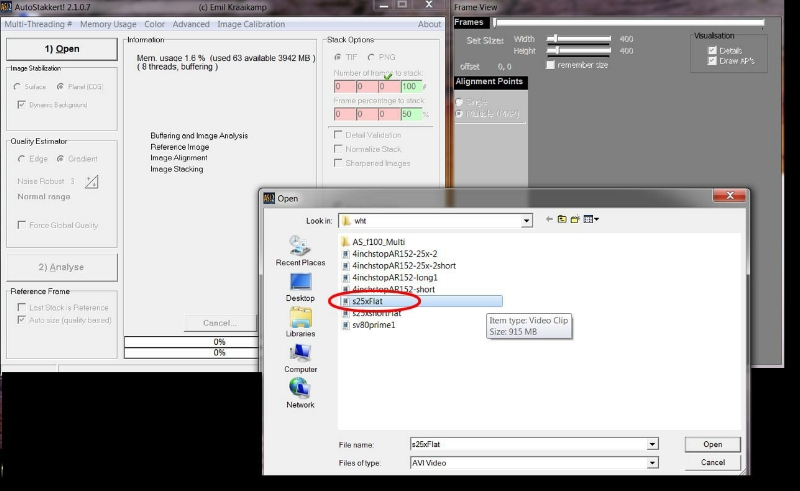
Introduction Here you will find a brief photo tutorial on how to make and use flat fields for improving the quality of your solar image close ups with the software Autostakkert. This will be for Barlow close ups, not full disk shots which will be covered in later article. The Problem: Dust shadows and vignetting. Your CCD chip in your camera is a dust magnet. While turned on and for a long time afterwards a strong electrostatic charge develops on the cover glass of the CCD chip in the camera. The affect is that when changing lenses, tubes or filters the dust and especially pollen in the air will be actually sucked through the cameras entrance aperture and rush inward to cling to the chip. This gets worse each time you take your camera out, and even if you try to clean it every time, it will still attract dust. The dust clinging to the sensor window appears as dark shadows in solar images, especially in longer Barlow projection shots because of the nearly parallel rays exiting from the system onto the sensor. Shadows appear the shape of a point source such as a star that is just inside of focus, usually round with bright rims or doughnuts for Newtonian or cassegrain optical systems. Since the invention of the CCD sensor, this problem has been mostly corrected by a mathematical process known as "Flat Fielding". To do this, We take an image of a uniform light source such as an illuminated screen, daytime sky or out of focus center of the solar disk and record an image of all the dust on the sensor. This image is applied to the actual image taken with the same optical configuration and mathematically (division) cancels out the dust shadows and vignetting in the image producing a clean perfect background canvas for your images to lay upon. Taking the solar flat: After taking a series of images of the suns features in either white light or HAlpha, without changing either the orientation of the camera or optical system, center the suns disk so it fills the field. Put the sun outside of focus until the features disappear in a blur, (about half an inch) and take around 500 frames in an avi for use later. Anytime you change anything in the system, be it camera orientation, filters, or even adding an aperture stop, you will have to take another flat for that set. Thats it. Pretty easy actually. Now here is how you use this extra frame in Autostakkert to correct the solar images. The first Step is before you process your solar images to create a master flat for the next series of images the flat was shot for. Open the flat AVI file you shot first.
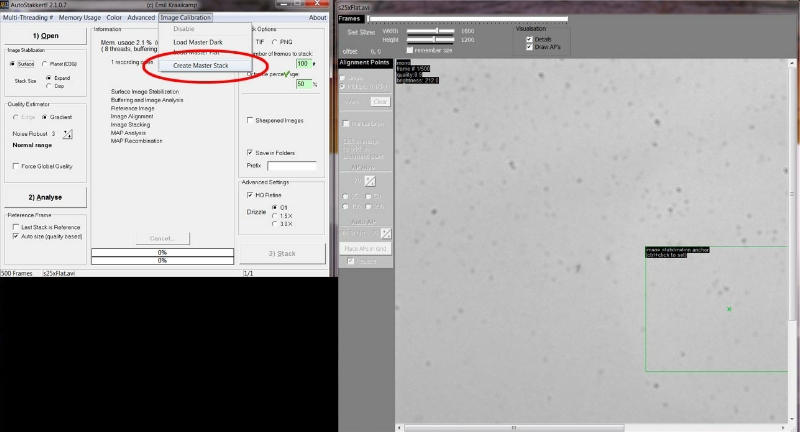
Click on SURFACE in the check box and that is where it will stay for the remainder of all your solar images. Then in the Image Calibration menu, pick CREATE MASTER FLAT. What this will do then is ask you to name the file - call it something like "Flat-5xbarlow" or something to identify which images it goes with. Hit Ok, Then it will stack all the frames with a median combine for the selected flat AVI and save the file. Thats it. Your done with this flat for the bunch of images shot with say the 5x Barlow. See the image on the display to the right on the screen capture below? thats what a flat looks like, a white image with dust specks all over it. THAT is what we are going to remove from your hard earned solar images!
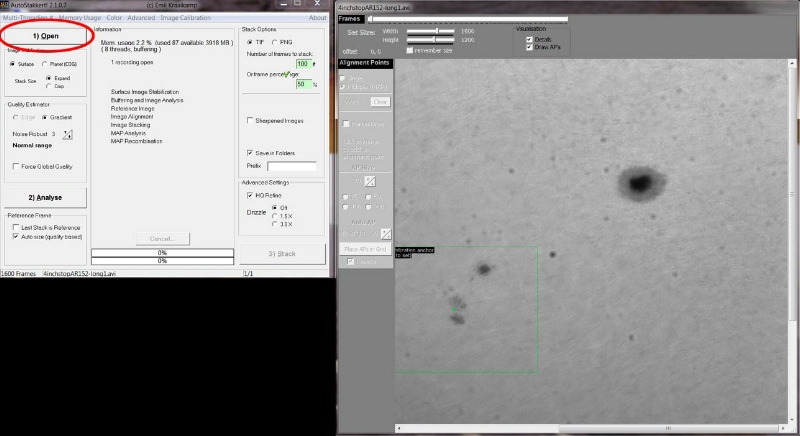
Next we are ready to process all the solar image files to go with that flat. Open the solar image file first. On the right you'll see the first frame of the AVI sequence and all the dust shadows can be seen in addition to the sunspots. (below)
Next we load the flat we made by selecting it in the calibration menu - LOAD MASTER FLAT. this puts it in memory until you clear it out with the DISABLE command in the same menu.
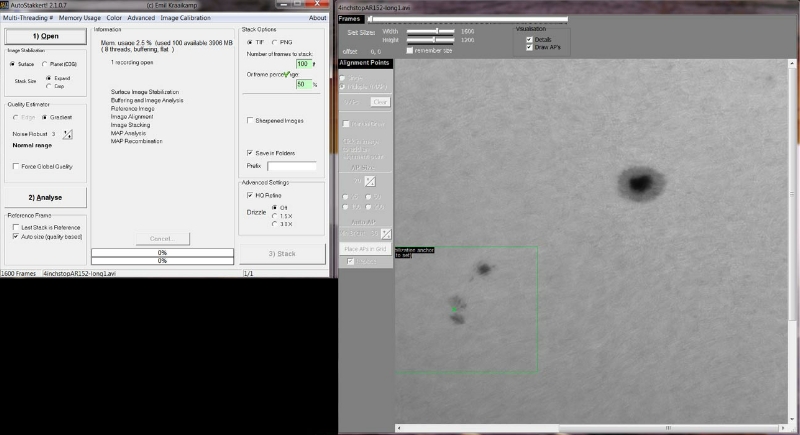
Now as soon as you load the flat - something really great happens: the first frame is calibrated. Look at the right frame here now in the next image below. No more dust shadows, and in a full frame view you would no longer see any vignetting in the image either. Now when you process this and any other frames this flat will be automatically applied and you will have a perfectly clean slate for your solar images. Now when your done with this set and want to run another without this flat because either you didn't take any with your 2x Barlow, or it is a different file, either select the new flat you made for that set, or just select the DISABLE function to clear it. out. Thats it. You can batch process a whole set of say 5x Barlow shots by simply dragging the whole set to the open button and batch processing them. Now for some examples of what flat fielding can do for you...
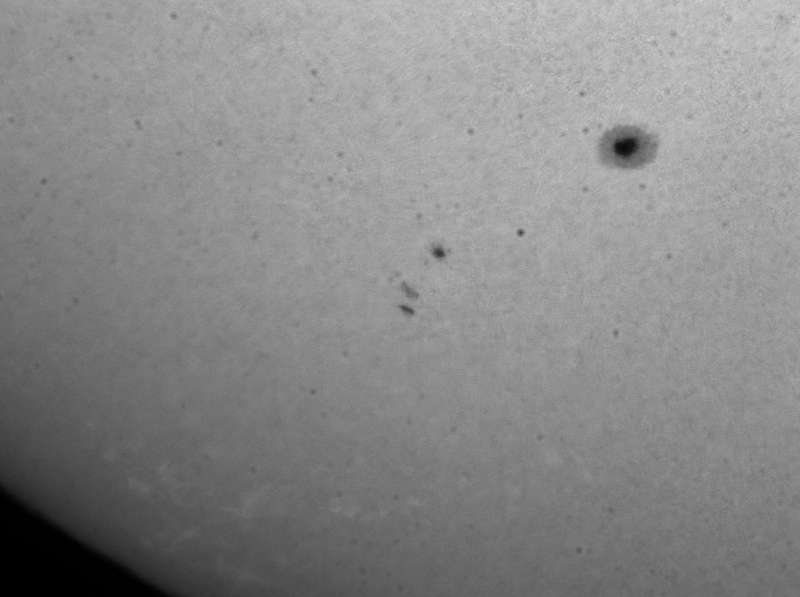
Here is the 5x Barlow shot below, without using a flat that has been stacked and ready for sharpening with your post processing program. Hundreds of pollen grains dot this image and will be present in the processed image. :(
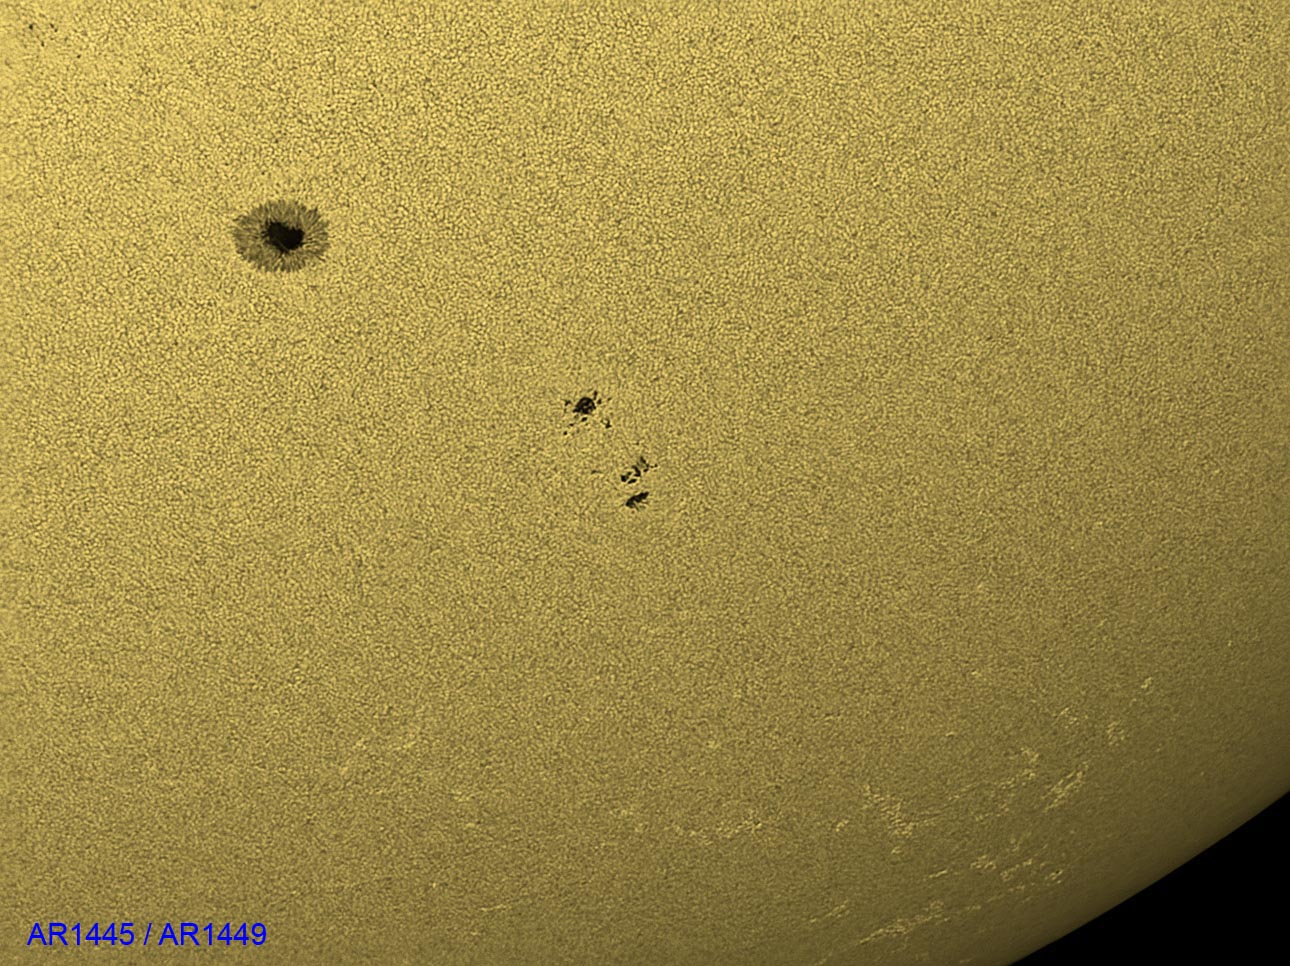
Same image but run with the flat calibration selected and the set run. Clean, no vignetting. Your best you can do! :)
Final full frame and processed image made from the above stack:
Conclusions While you can never get all the dust off the sensor at the start of the imaging session, it will accumulate during the session and running a simple fast flat every so often will clean it the image to look its best. Good luck and happy imaging! |