|
|
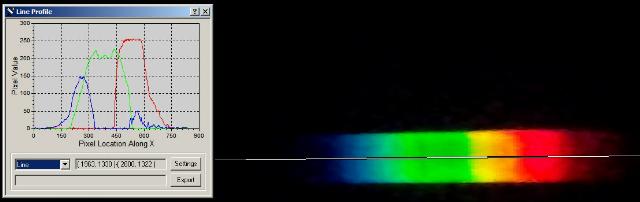
Introduction Astronomers have been both viewing and imaging the Sun for over a century now, and the delicate features found in the visible spectrum on the Suns photosphere can be enhanced, and brought out more clearly with the use of colored filters. In this article, I will discuss the use of various green colored filters, and our experiences with them when imaging the Sun in the visible spectrum - "White Light" as it it often called. A great many months has been spent at the telescope testing dozens of green filters, and I will be highlighting my favorites that were the most effective at enhancing Solar photospheric details. Why Green Filters? The colors of solar features are subtle at best. While the disk is by definition pure white because our eyes are tuned to the specific output of our star exclusively, the sunspots, intergranular lanes and pores all have a slight magenta color because of their cooler color temperature. Opposite on the color wheel of magenta is green, and therefore the best contrast enhancement out of any other color will be shades of green. Faculae and white light flares are more bluish, but a green filter does well at enhancing this shade too depending on the bandwidth of the green filter. Equipment used for testing. We first identified green filter candidates in the field by selectively testing dozens of green filters. These ranged from Wratten types to G filters in CCD LRGB filter sets, to solar specific band pass filters. We even tested a few narrow band night time imaging filters for comparison such as the Lumicon OIII filter. Also, it was critical that we also tested the filters with and without an IR blocking filter so we could evaluate in the field the IR leak of each filter candidate. For testing in the observatory, we used a 80mm f/6-f/30 Stellarvue SV80s with Zeiss optics which are superfine in quality. A front filter of Baader Astro Solar Safety film was used, and the results were then compared to using a Baader Herschel Wedge. In the lab, visible range spectrographs were used, and an infrared lab camera for a further check of IR leak. Filters - the Final Four Four filters were narrowed down to be the most promising for solar imaging. Three did very well in the field, and the fourth gave us quite a run around for a while when we first received it until we were able to find its optimal configuration for solar use. Here is the list: 1. Wratten 58 This filter is commonly available from many suppliers, and the material used varies considerably. Ours was an original Kodak gelatin filter mounted in a 1.25" filter holder. Other manufacturers will have a similar color, but different IR characteristics. This filter worked reasonably well without an IR blocker, but was significantly better with it. 2. Lumicon OIII The narrow band of 30 angstroms made for a decent competition for other narrow solar only filters, and we found it gave decent results on improving the seeing and sharpness, but the contrast on sunspots was not as much as hoped. No IR filter was needed for this one since it blocked the IR well itself. 3. Custom Scientific G band This was our winning filter, until we were able to figure out the whole story on the Continuum filter and make it work even better. This filter (CS-G) greatly improved contrast in all solar features, and sharpened the seeing by a huge factor. It is made of Schott glass and blocks IR without the need for additional IR blockers. A very fine choice if you only want one filter. 4. Baader Continuum This filter when used visually gives a small and hardly noticeable contrast boost in solar features. Imaging with this filter was an adventure in scientific discovery. When we first tried the filter by itself with the Astro Solar film, the results were very bad - the contrast and detail was much worse than the white light view with no filter! After examining it both spectroscopically and with the IR Lab camera, the issue became obvious. The Continuum filter has a huge red and IR leak that was swamping the tiny narrow band green signal and flooding it with out of focus IR that was broad band in nature. When we retested the filter in the field with a Meade DSI-IR blocker in place, the results were staggering. Not only did the sharpness take a huge jump, the contrast went through the roof. It was even better by a substantial amount than the CS-G filter. Similar results were obtained with the Herschel wedge, and since the coatings on the prism and ND filters block most of the IR, the difference between no IR blocker and with it was much less. (But still half the exposure with the IR blocker in place) Examining the Visible light spectrums Here are some visible light spectrographic images we took in the lab of the various filters. The red leak is not shown here, but was tested in a different way later. Full Spectrum - No filter
Custom Scientific G filter:
Wratten 58:
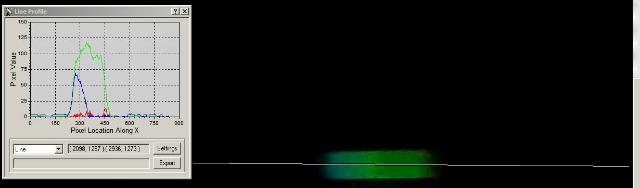
Baader Continuum:
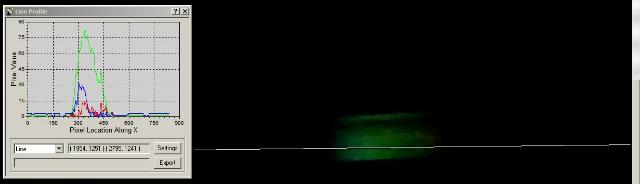
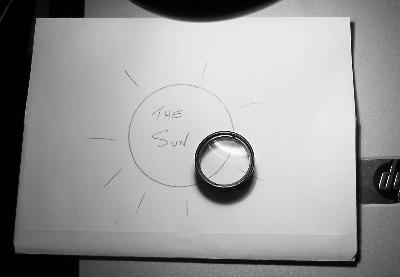
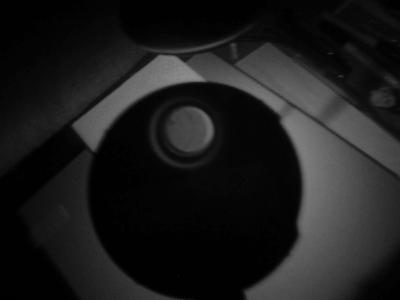
Infrared Blocking Characteristics The amount of IR that passes into a DMK type monochrome camera which has its peak sensitivity in IR is crucial to getting the sharpest images in visible light. The less the better. To test the IR leak, a special NIR filtered CCD camera was used to image the filters against a white background, lit with a solar analog light source. The amount of transmission in IR could then be seen directly. For these tests, all filters were mounted in an Orion filter wheel, and you will see the wheel in silhoette with the selected filter at top for evaluation. Ideally, no IR should pass. Here is an image of a standard Meade IR blocking filter in visible light lit by a solar analog source. It appears clear to the eye.
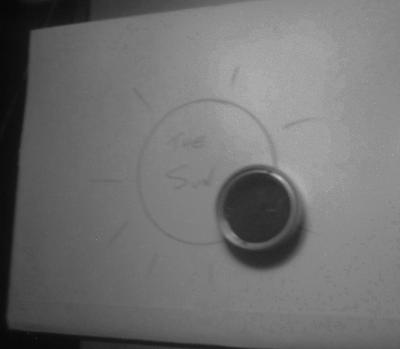
Next we view it with the IR camera. Here is what it sees. It is nearly black and blocks IR.
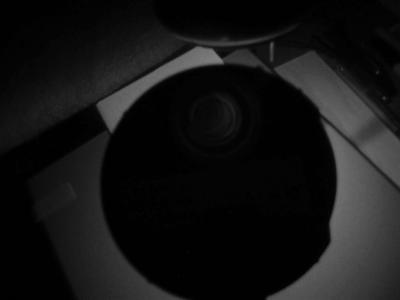
Below is the Baader Continuum filter in the wheel. Its pretty clear! That means its like a piece of clear glass to IR.
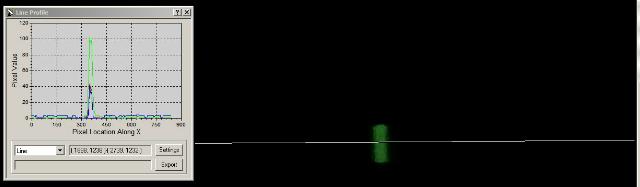
But if we put in the IR blocker in series with it, this is what we get. Nearly but not quite a black out. A really good IR blocker such as the Baader IR/UV would be even better.
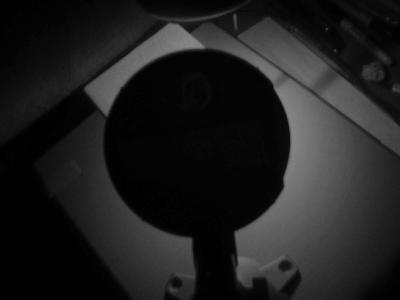
The CS-G filter lets nothing through in IR. It is very good at blocking IR!
Here are a few spectral plots of the various filters for comparison. Taken from a variety of sources: Solar spectrum at top Baader Continuum middle Scaled CS-G filter bottom
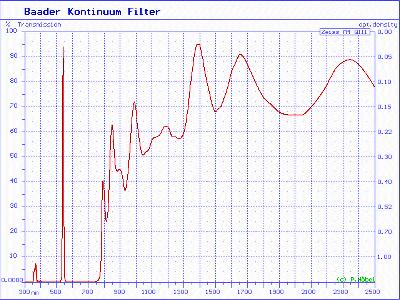
This is the advertised filter response Baader provides when you buy the filter. But this is not the whole story!
This is what you are getting (Thanks Mark Townley for finding this) Look at all the IR ready to blast your DMK chip.
When combined with an IR blocker, the right 3/4 of this chart goes to flat line. At the telescope - Imaging results From the very start, the CS-G filter was orders of magnitude ahead of all the rest, with superior contrast, sharpening up poor seeing to great seeing, and improving resolution of the finest details. The close second was the Wratten 58, which did a remarkable job for such a broad band filter. This improved remarkably when used with an IR blocker. The Continuum filter when used with the IR blocker however was significantly sharper, and the seeing even better. You cant turn total mush into great seeing, but the improvement was outstanding. This proved to be even better on contrast by a substantial margin over IR pass filters such as the Hoya R72, Ha 6nm, Wratten 25 or 92 in bad seeing and the resolution on solar granulation was approximately double that of any red filter because of the wavelengths involved and Dawes limit for that wavelength. Full disk Solar images with the different filters. When looking at these images, the features you inspect besides the contrast of the spots is limb faculae, granulation, and most importantly the amount of limb darkening. The contrast boost of the filter is in direct proportion to the amount of limb darkening as well. All shots here with either a DMK31 or DMK51 Mono camera. White light - NO FILTERS (Through Astro Solar Safety film ND5) Conclusions From our evaluations in both field and Lab, for a single filter, the Custom Scientific G band filter was on top. It was edged out however by a substantial margin by a pair of filters that when used in tandem, out perform it: The Baader Continuum filter + IR blocker. For Baader Wedge users, good results can be had without the IR blocker, but there is still so much IR coming through that we measured the exposure to be double without the IR blocker. When the blocker is used, the contrast was slightly better and you then are getting the most out of your equipment. Recommendations for Solar imaging We recommend a Baader Continuum filter and Baader or Astronomic IR/UV blocker filter for both Astro solar film, Glass filters, and Herschel Wedges. Happy imaging! |


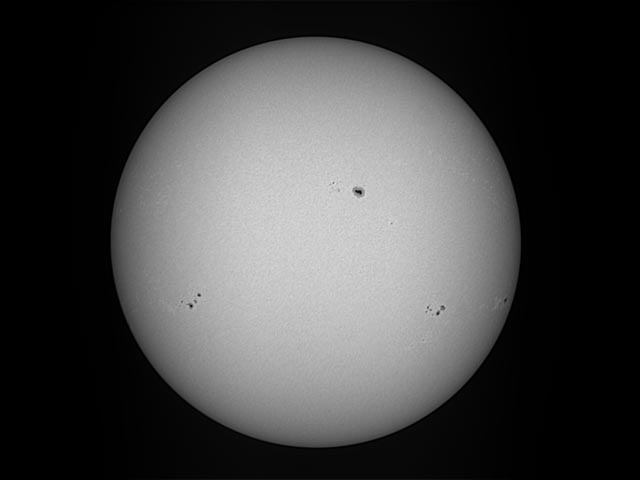 With ONLY and IR Blocking Filter (Through Astro Solar Safety film ND5)
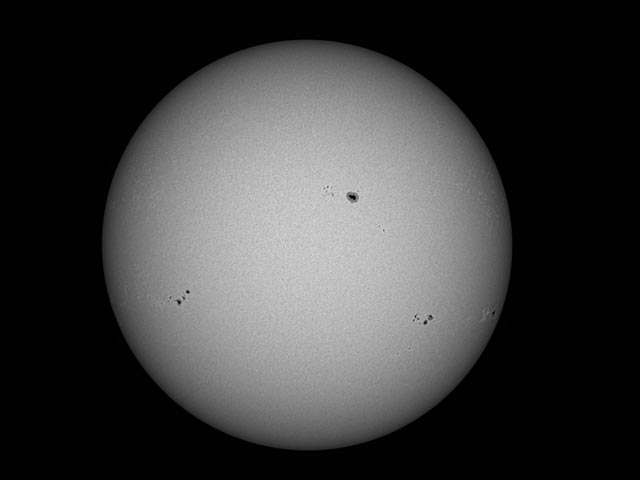 Wratten 58 - NO IR blocking filter (Through Astro Solar Safety film ND5)
 Wratten 58 + IR Blocker (Through Astro Solar Safety film ND5)
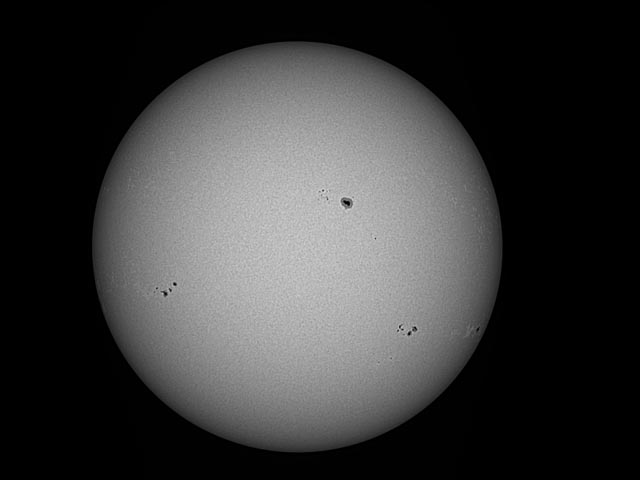
 Custom Scientific G filter (Through Astro Solar Safety film ND5)
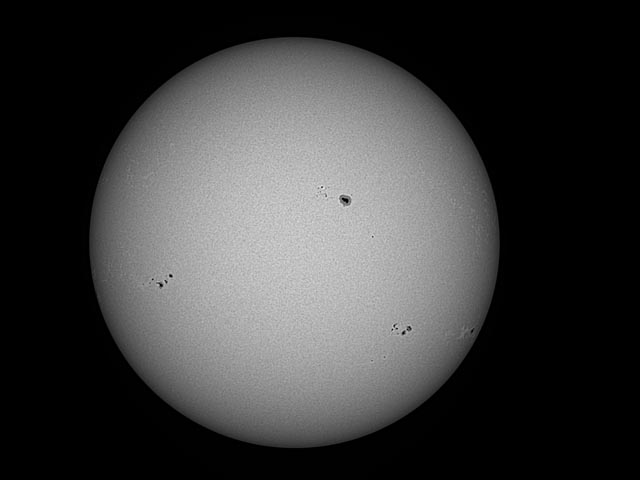
 Baader Continuum NO IR (Through Astro Solar Safety film ND5)
 Baader Continuum + IR blocker (Through Astro Solar Safety film ND5)
- Oh man, look at that granulation!
Baader Continuum + IR blocker (Through Astro Solar Safety film ND5)
- Oh man, look at that granulation!
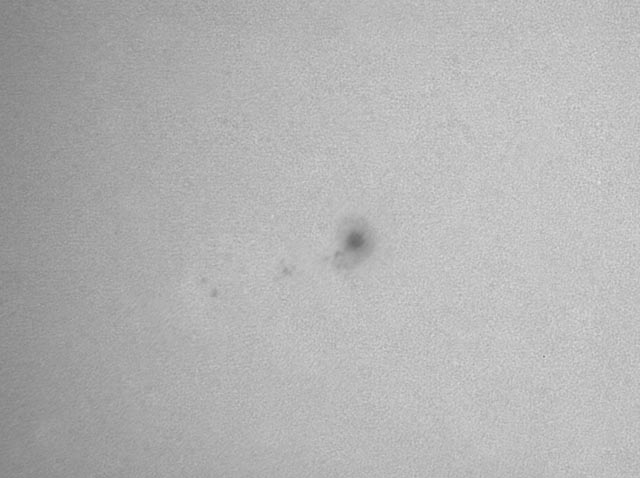
 Close ups with the 5x Televue power mate.
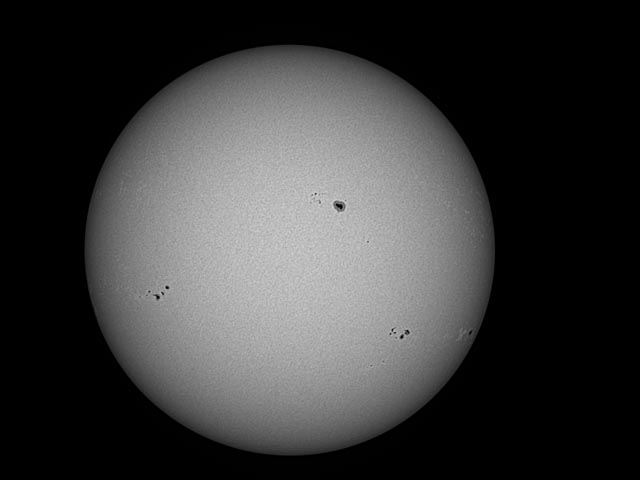
White Light - NO FILTERS (Through Astro Solar Safety film ND5)
Close ups with the 5x Televue power mate.
White Light - NO FILTERS (Through Astro Solar Safety film ND5)
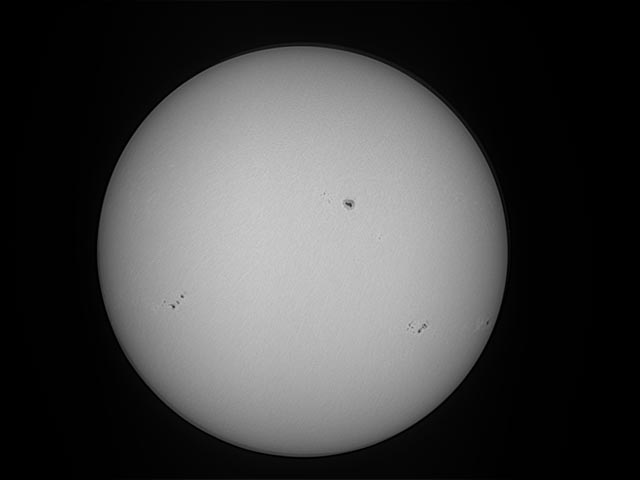
 Baader Continuum NO IR (Through Astro Solar Safety film ND5)
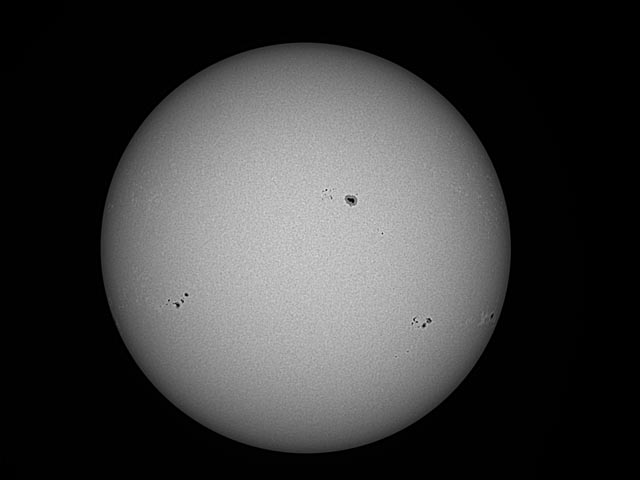
 Custom Scientific - G (Through Astro Solar Safety film ND5)
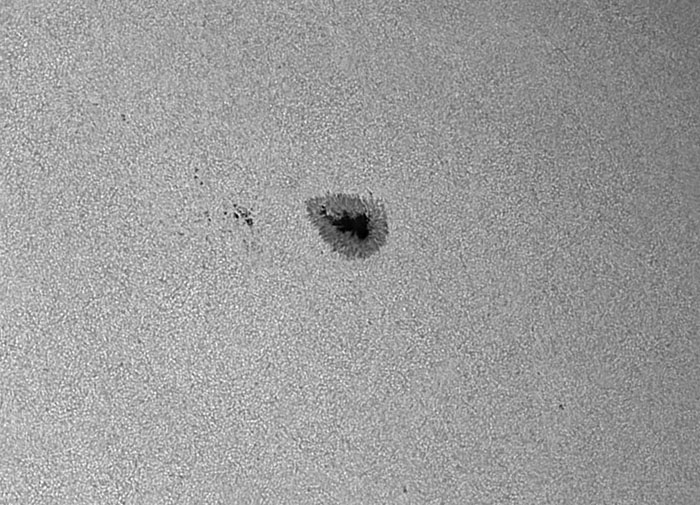
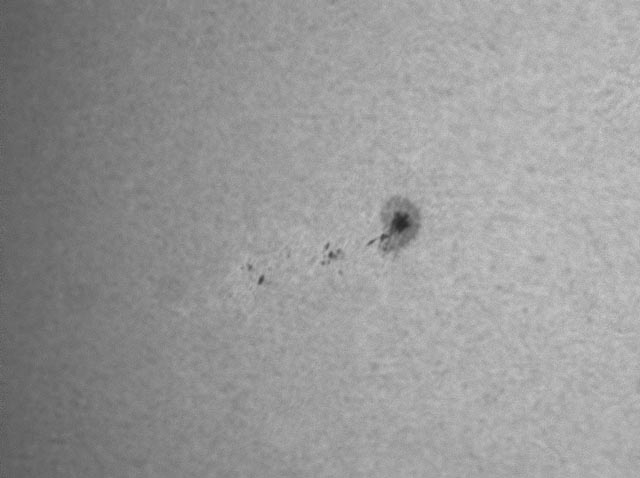
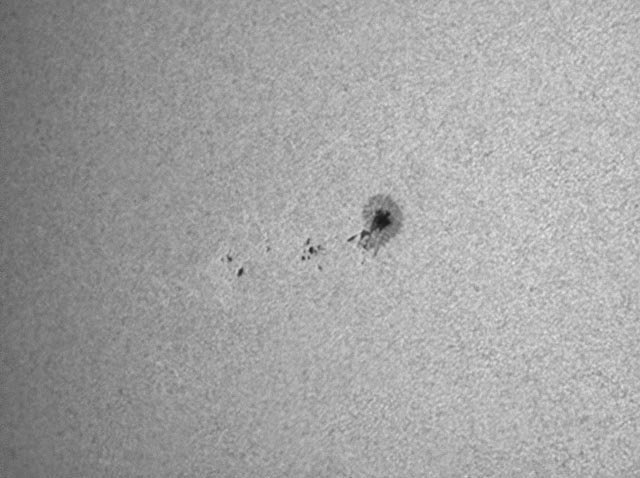 Finally here is a single shot of a large recent singular sunspot, with the Baader Continuum + IR blocker at 5x:
You can see that if properly IR blocked, it is a powerful filter for displaying maximum white light details!
Finally here is a single shot of a large recent singular sunspot, with the Baader Continuum + IR blocker at 5x:
You can see that if properly IR blocked, it is a powerful filter for displaying maximum white light details!