|
|
Introduction Now here is a small project which breathed life into an old and quite unused small Newtonian telescope I had stored in a corner of the house. At some point, an imager of Solar System objects wishes for more aperture and resolution than is afforded by a smaller telescope, which can only achieve a few arcseconds of resolution. Lunar and planetary imagers typically use a bare minimum of a 6 inch aperture - prefferably more, to see those fleeting moments of seeing for the imense details thier instruments can produce. My best shots of Jupiter and Saturn for example are with the 12.5" newtonian and up to a 3 - 5x barlow lens. Because the Sun has details down to sub arc second levels in white light, the same aperture size priority rules, and one can achieve world class results - many times equalling professional instruments in quality - by going to larger amateur sizes such as 10 - 16 inches of aperture. Our goal then, is to construct a safe, large aperture instrument designed specifically for solar imaging and viewing, with sub-arc second resolution, and use sharp abberation free reflective optics to keep not only costs down, but to have greater control over the light reduction path in the instrument. We do this by stripping the primary mirror, and sometimes the secondary of its aluminum coating and this reduces the reflectivity from around 90% to around 4.8% after the coatings are gone and we are reflecting off of bare polished glass. This makes the solar image much safer to deal with, being reduced in brightness of dangerous IR/UV radiation by 400x. To bring the transmission to a visual safe level, we need a total of 10,000x reduction (ND5) but for imaging we desire far less, a 1000x is perfect to provide a bright image to use barlows and projection magnifications and still maintain a fast seeing-freezing exposure time. To accomplish both goals, we can provide additional filtration at the focal plane/eyepiece end. Since there is no longer any heat, there is no danger of cracking the filters or melting or warping optical components! In preparation for constructing a much larger solar scope, I decieded to modify my 6 inch Newtonian in this manner to construct a prototype for future larger designs. I chose for obvious reasons to modify my Meade 622 Schmidt Newtonian to a solar imaging scope. This scope has not been suitable for night time imaging because of its fast f/3.6 optics have too much coma on the edges of the field for even the venerable Baader MPCC coma corrector to handle. The mirror was not the best optically either, and usually low magnification views were the best it could handle. But all the same processes and problems I would encounter in a much larger solar instrument would be discovered, and dealt with on a smaller and more managable level. So lets talk about how to modify a Newtonian for solar! Step 1 - Dissassembly and stripping the optics of the Aluminum coating I decieded to strip both primary and secondary mirrors of aluminum. This would yeield over a 400x decrease in light at the focal plane, even less than a Herschel wedge would produce which has only one reflection. The primary mirror was pulled out and removed from its cell. The secondary was a challenge, since Meade made it with many tight fitting pieces that slid together. When both were removed, the coating removal process was next. There are a number of chemicals - all of them rather dangerous if used without the proper safety proceedures - to strip the mirrors coating. The safest - and probably slowest, is Ferric Chloride. This is the chemical used in stripping copper to make printed circuit boards. Not only does it strip copper, but also aluminum. But it does not fare well on overcoated modern mirrors! All modern mirrors have a oxide of some sort coating the aluminum to keep it from tarnishing. This is added during the coating process and is not dissolvable in any acid you want to deal with. The aluminum will be eaten from the sides and the coating will fall off in flakes. You used to be able to buy this chemical at Radio Shack, but not recently. It can still bought at some electronics supply stores. Another chemical that has been used, but DAMAGES the glass by micro pitting it is Lye. Yes, Draino will dissolve the coatings off your mirror. But will also frost the glass and this is not recomended. We need a clean and polished surface to image the Sun. The most commonly used chemical is the most dangerous too, Muriatic acid. Surprisingly easy to get, this is used (dilluted somewhat) for cleaning the cement off of brick and block and cleaning concrete driveways. It is also used to add to pool water to acidify the Ph level. (!). Pool acid is too weak, so is the muriatic sold as "odor free" - Its not the real deal. I got mine at ACE hardware, in 1 gallon jugs labeled with skulls and crossbones. This is the good stuff. You can dillute it for use in warmer temperatures or use it straight in the cold, since it is pre dilluted to 20%. Its nasty, so use rubber gloves, safety glasses and always pour the acid into water, never the other way around. A plastic bowl was put in an OUTDOOR laundry tub, and the six inch mirror and secondary were put in the bottom. Add water to just cover the mirror, then add the acid to the desired level. Action is very slow, it may take an hour to see any bubbles at all. It took my mirrors a week in the acid bath to clean off the aluminum. Now my daily temperatures never got over 47 degrees because Winter is approaching, so your results may be faster in the summer. Once it is done, the mirrors were removed and washed very thouroly in water. The acid will be seen to have many sparkling shards of what looks like thin glass floating in it. Thats the overcoat that flaked off as the aluminum was removed. The optics were cleaned with alcholol, dried and now were ready to re install in the telescope. Step 2 - getting the tube assembly ready for solar work. Unlike night time imaging, the colors of the tube and optical mountings must be carefully considered! The heat of the sun will cause strong thermal gradients in the tube, cell and optics distorting the images if not done correctly. There are some obvious changes you will do first, like painting the tube a nice glossy white to reflect heat, and the front sides of the diagonal vanes and central hub. The insides of the tube must be flat black to keep the contrast up in the final image, just like deep sky. But now the next step is where solar scope builders dissagree on. Now that the primary mirror is essentially a clear piece of glass, what color do we paint the mirror cell? It will be exposed to the full strength of the sun beating down on it, and it gets blazing hot. This will heat the mirror, and create horrible thermal currents destroying any image definition, and warp the optics. So do we paint it black to keep the contrast high, or flat white to keept he heat down at the expense of contrast reduction? About half of solar scope builders will say black, and the other half white. After a great deal of condideration, and being a long time Amateur Telescope Maker myself, I came to the conclusion that for a small mirror like this six inch, black would be best, BUT hold the mirror around the edges and leave a hole behind it, with a gap for air flow and a black disk over the hole behind the mirror cell. But for a large mirror? I will have to do more experiments to answer this one! After the cell was painted black and a back plate was made to go behind it, the mirror was reassembled into its cell, and I painted the back of the secondary - which was frosted and not polished flat black. There would be no extra reflections from the back of the diagonal this way. (double images), The optics were then laser collimated for outdoor testing. This had to be done at night in the dark, since the returning laser beam was 1/400 brightness and very hard to see! Step 3 - First light and optical testing First light was on November 23rd, 2011. We mounted the scope in its cradle, and pointed it at the sun. I put my hand on the focal plane to see how the image would look, and it was really hard to see in direct sunlight. No heat what so ever. Just a small image, a bit brighter than direct sunlight. An ND .6 and green filter were put in the focuser tubes and the DMK camera were put in. The image of the sun, which took up about 2 fields was really bright on the computer screen. Even at 1/10,000 second exposure, it was very bright. I did get one full disk shot but the remaining optical testing had to wait until the Baader 1.8 ND filter I ordered came in to bring the brightness down to a reasonable level. Your ideal exposure for daytime imaging to freeze seeing has been found by many imagers to be 1/1000 second. But the image had sharp edges and clean sunspots clearly seen. It worked! Working on the Telescope - Images of the process The diagonal mirror back in its cell after the aluminum was removed. Look at the reflection of the overhead flourescent light, it is really very dim here because it is only 4.8% the original brightness.
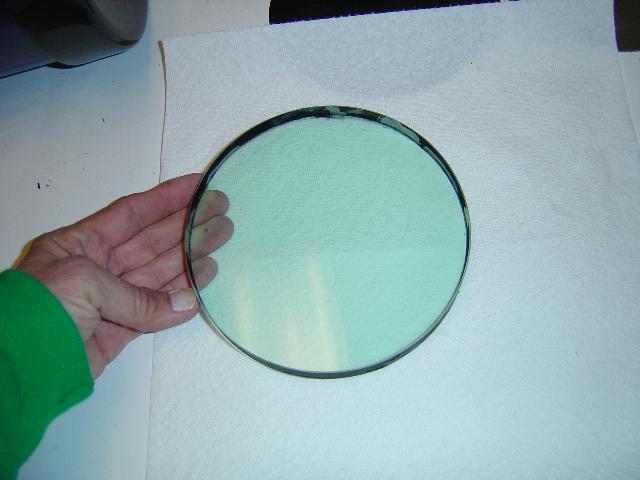
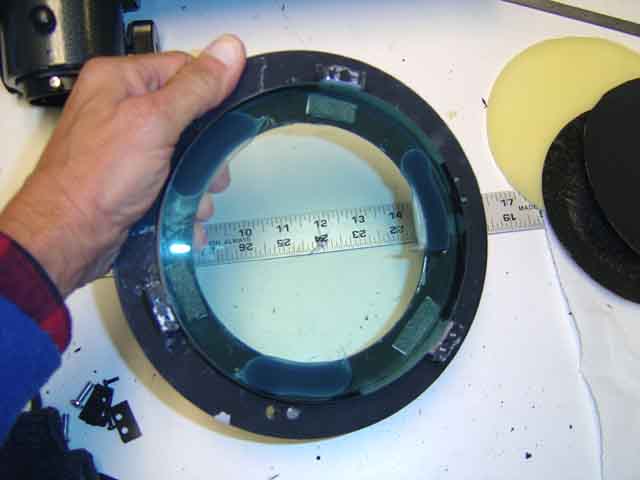
The Six inch mirror after stripping. It looks like a giant negative lens, and reflects very little of the overhead lights as well. Unlike the diagonal mirror, the back is not frosted but is very close to polished. This will be an advantage to let the light through and out the back of the telescope into a black chamber of sorts.
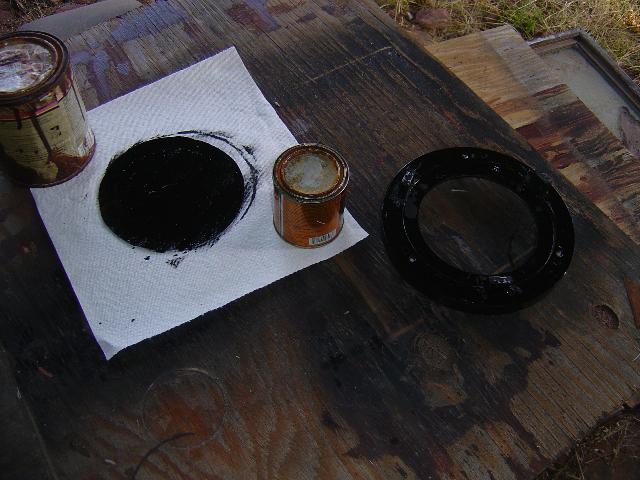
Painting the mirror cell - with new hollow back, and the black disk to go behind it later. Most of the sunlight, about 95% of it will go out the back and move away from the mirrror.
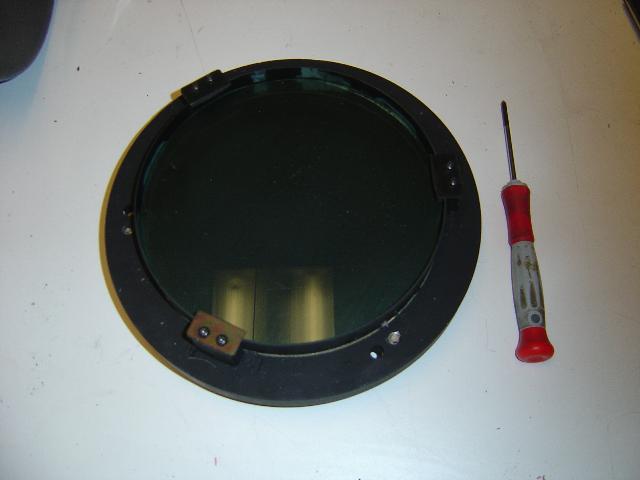
The mirror back in its cell. The black backing is flat black painted foam rubber, that does not touch the mirror. The reflection of the overhead light is from the BACK of the mirror, which is flat but very smooth. This is critical - Light will pass THROUGH the mirror, and pass out the back where the black disk will create a black backdrop so we dont loose imaging contrast. Although there will be SOME light getting back into the camera from a reflection from the back of the mirror, it will be out of focus, minimal (again, 4.6%) and insignificant.
Additional Images: This is round two on the mirror cell. I have used this technique for years with great success, and here is the mirror now attached with three dabs of silicone rubber adhesive, spaced up from the bottom ring with 1/8 spacers. No stress on the mirror now, and the back is open to allow the heat to escape.
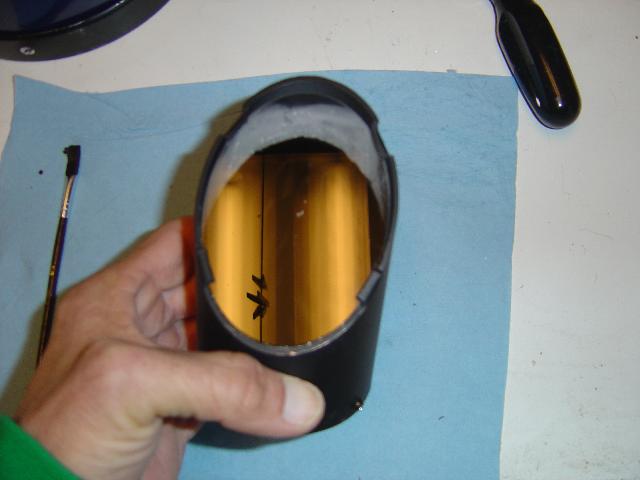
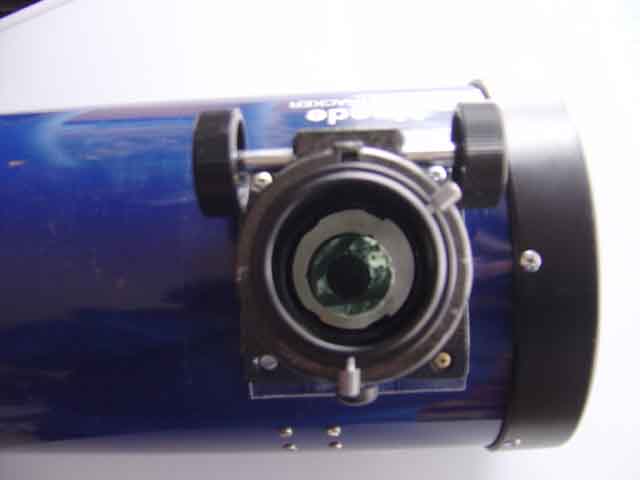
This is the view looking directly at the mirror from the front. With the black backing in place behind the mirror, the view is very dark! Only 4.6% of the light is coming back to you.
A look out the window at a very bright snowy scene this weekend, you can see the trees and snow very dimly reflected off of the unaluminised optics.
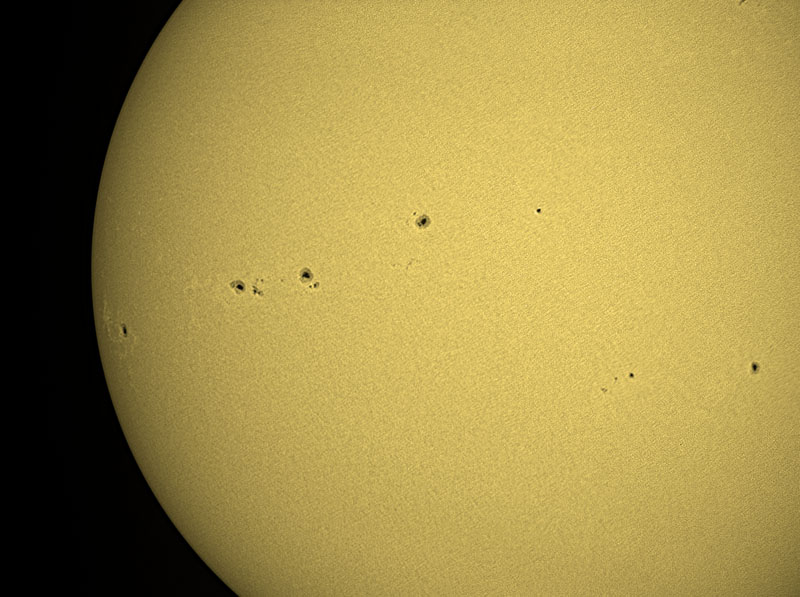
First light images with the new Solar Astrograph I had about ten minutes before we headed off to San Diego for Thanksgiving to do a fast test of the instrument under a clear sky. With a focal length of 550mm, the sun took up about two frames with the DMK3U camera, and I did a montage seen here of the full disk with four frames. This was with the a ND.6 filter, and the only filter I had that was dark enough - a deep red imaging filter. The results were encouraging, and proved that I was not getting double images or strange banding. Here is that very first image:
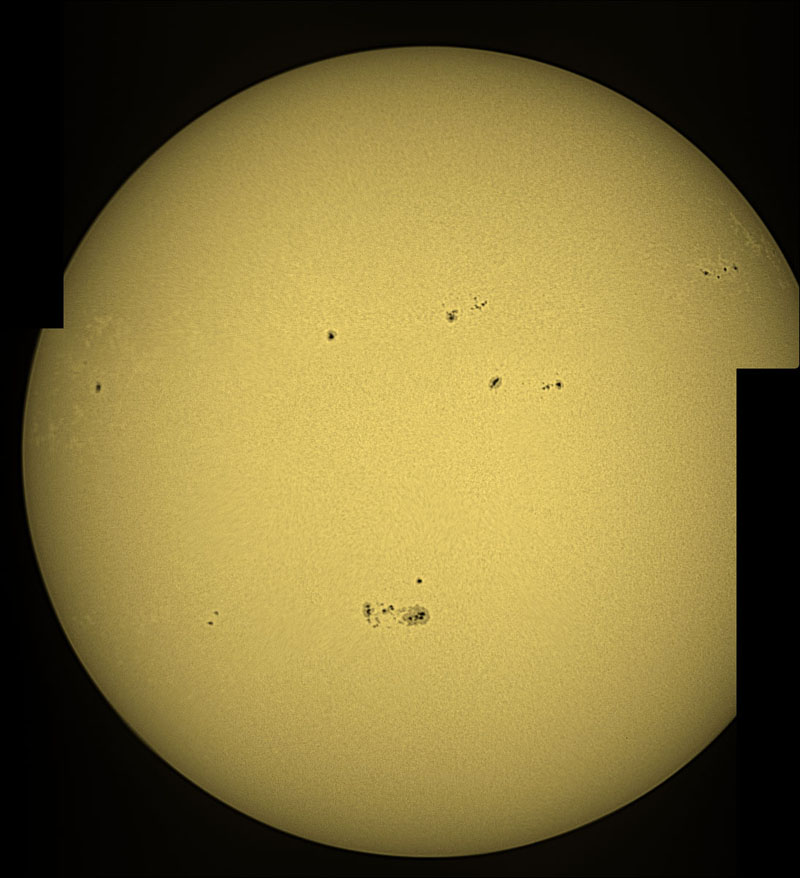
This was before the mirror was remounted, so we have this as a comparison. And after we remounted the primary using the silicone mount, the results were noticeably better, but I still would not be able to use any higher magnifications because of the low quality of the mirror. This is a two part mosiac, with a few pieces missing of the entire sun, using the new Baader ND1.8, and Continuum filter:
Conclusions From the start of this entire project, I could see that making a large aperture and low cost high resolution instrument for viewing the sun safely was going to be a reality using a modified Newtonian Reflector. The encouraging results point the way for future larger instruments - certainly ones with much higher quality starting optics than I used here! But an unused telescope, that sat for year in the corner of a room, now has a new lease on life, and has given me more varied experience in working with these fine instruments. What fun! |