|
Before
|
An
Advanced Processing Technique
for
Lunar and Planetary Images
|
After
|
Uploaded 10/30/04

|
Producing highly
detailed images with a broad tonal value, yet retaining good
contrast is the key to breathtaking lunar and planetary astrophotos.
Here I present to you a technique to greatly enhance your lack
luster moon shots, to something even the average viewer will
be impressed with. This is not an unsharp masking or sharpening
technique. It is a tonal masking technique that highlights low
level contrasts without boosting grain.
The starting image.
The original is a fast,
well focused exposure with my Pentax K1000 with E200. The scope
however is an RFT, poorly suited for high resolution work, but
excelling at wide fields with low coma. As you can see from the
first image, the shot was rather unextrordinary, and even after
a high level of unsharp masking in Photoshop, this was the best
I was able to get after much experimentation in processing. So
I knew that more could be seen if I could retain the resolution,
but expand on the tonal range of the image. I came up with this
technique, which I am going to share with you now.
|
Please click
the thumbnails for the enlarged view (800 x 600)
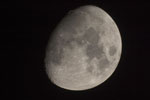 |
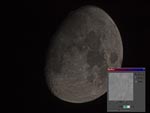
The
original image, 1/500 sec with a 6 inch f/3.6 schmidt Newtonian.
I have applied the unsharp mask at a fairly high level, but the
photo still is lacking in tonalities. |
 |
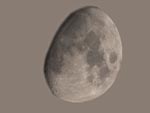
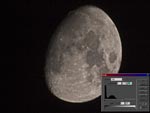
Copy
the image to the clipboard and paste over original. Combine layers
with "Multiply". You will get a rather dark contrasty
image as seen here. |
 |
The
next two steps are crucial to get top results from this technique.
First, we will only work on the background image. Turn off the
top layer. Using the magic want tool, select the black sky around
the moon. Get as much of the terminator as possible. Go to quick
mask mode, and using the paint tool and a sizable brush, finish
masking the last bit of terminator so only black sky remains.
Go back to standard selection mode to see selection. |
 |
Next,
using the eyedropper tool, select a brighter area on the moon
as a sample. Fill the black background around the moon. Why is
this critical? because when you use the high pass filter on a
sharp transition in brightness from the limb of the moon to black
sky in our next step, you will get haloing which will show up
in your final image as a limb brightening. |
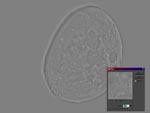 |
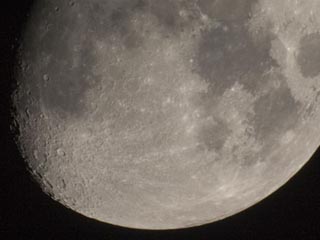
We are
next going to apply a high pass filter to this layer as seen
here, BUT it will be with the top layer turned back on (this
is an example of what high pass filtration does to the moon) |
 |
Now
turn on the upper layer, the combine method is still set for
multiply. Select in the layers dialog box the bottom layer to
work on only. Now apply the high pass filter to this lower layer
only - while looking at the combined composite image. Adjust
the amount to enhance the details such as rays and subtle variations
in the seas and crater bottoms to suit. The image will look a
bit dark at this point. |
 |
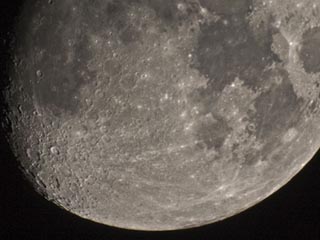
Finally,
when the image is rich and detailed, flatten the layers, and
adjust levels to bring up the white point. (top slider) |
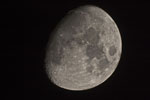 |
The
Final image, full of detail and tonal variations ! |
Instrument:  6" f/3.6 Schmidt Newtonian
Platform:  Televue GEM
Film:  Kodak E200
CCD Autoguider:
Exposure:  1/500
Filters:  NONE
Location:  Payson, Arizona
Elevation:  5150 ft.
Sky:  Seeing 8/10, Transparency 8/10
Outside Temperature:  10 C
Processing: Photoshop
HOME  SCHMIDT  GALAXIES     EMISSION NEBS     REFLECTION NEBS   COMETS
   GLOBULARS     OPEN CLUST     PLANETARIES     LINKS
|
|